Overview
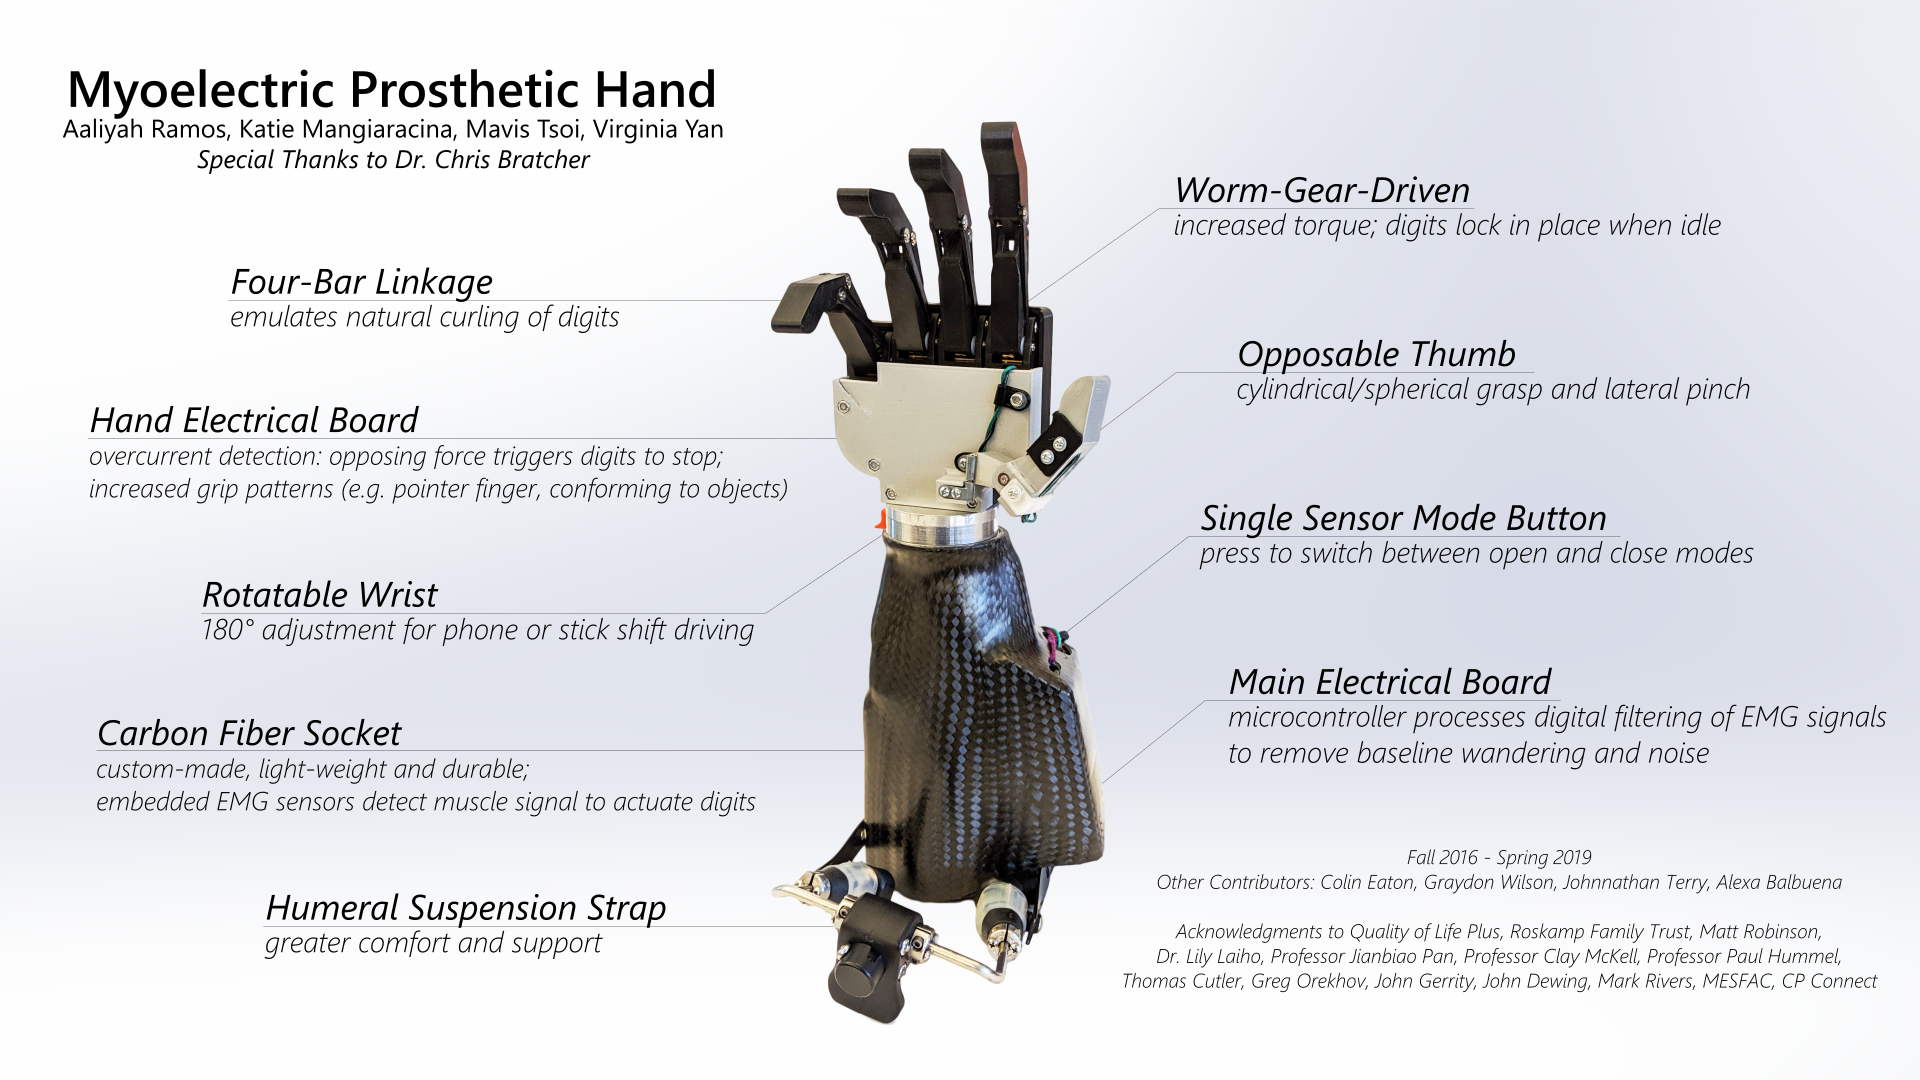
This project was formed under Cal Poly’s Quality of Life Plus Student Association to develop a myoelectrically controlled prosthesis for Chris Bratcher, a winemaker who lost his dominant right hand in a winery accident. Bratcher found his body-powered prosthetic hook too uncomfortable and wanted a robotic hand that is more intuitive to control and more versatile. The prosthetic hand relies on inputs from two electromyographic (EMG) sensors inside the socket to activate the digits, with one sensor controlling the open motion and another controlling the close motion. Based on sensor data collected from Bratcher, a digital filter was designed then implemented using the microcontroller's analog to digital converter to detect "on" and "off" signals, regardless of a wandering baseline. There are three main grip patterns: cylindrical (for holding bottles), pointer (for typing), and lateral pinch (for holding flat objects). A current sensing system was also implemented so that the motor will stop driving the corresponding digit once end of rotation has been reached, or once the digit is blocked. This system serves as a safety mechanism while also increasing the versatility of the hand by allowing additional grip patterns with minimal control. The firmware was then implemented as a per-digit finite state machine so that the sensor signals can be used to activate the digits while the current sensing system will stop digit activation when needed. The design is discussed a little in this webpage (feel free to reach out if you want to learn more), but if you want the interesting stuff, just skip to the results section and watch the final prosthesis in action!
Background
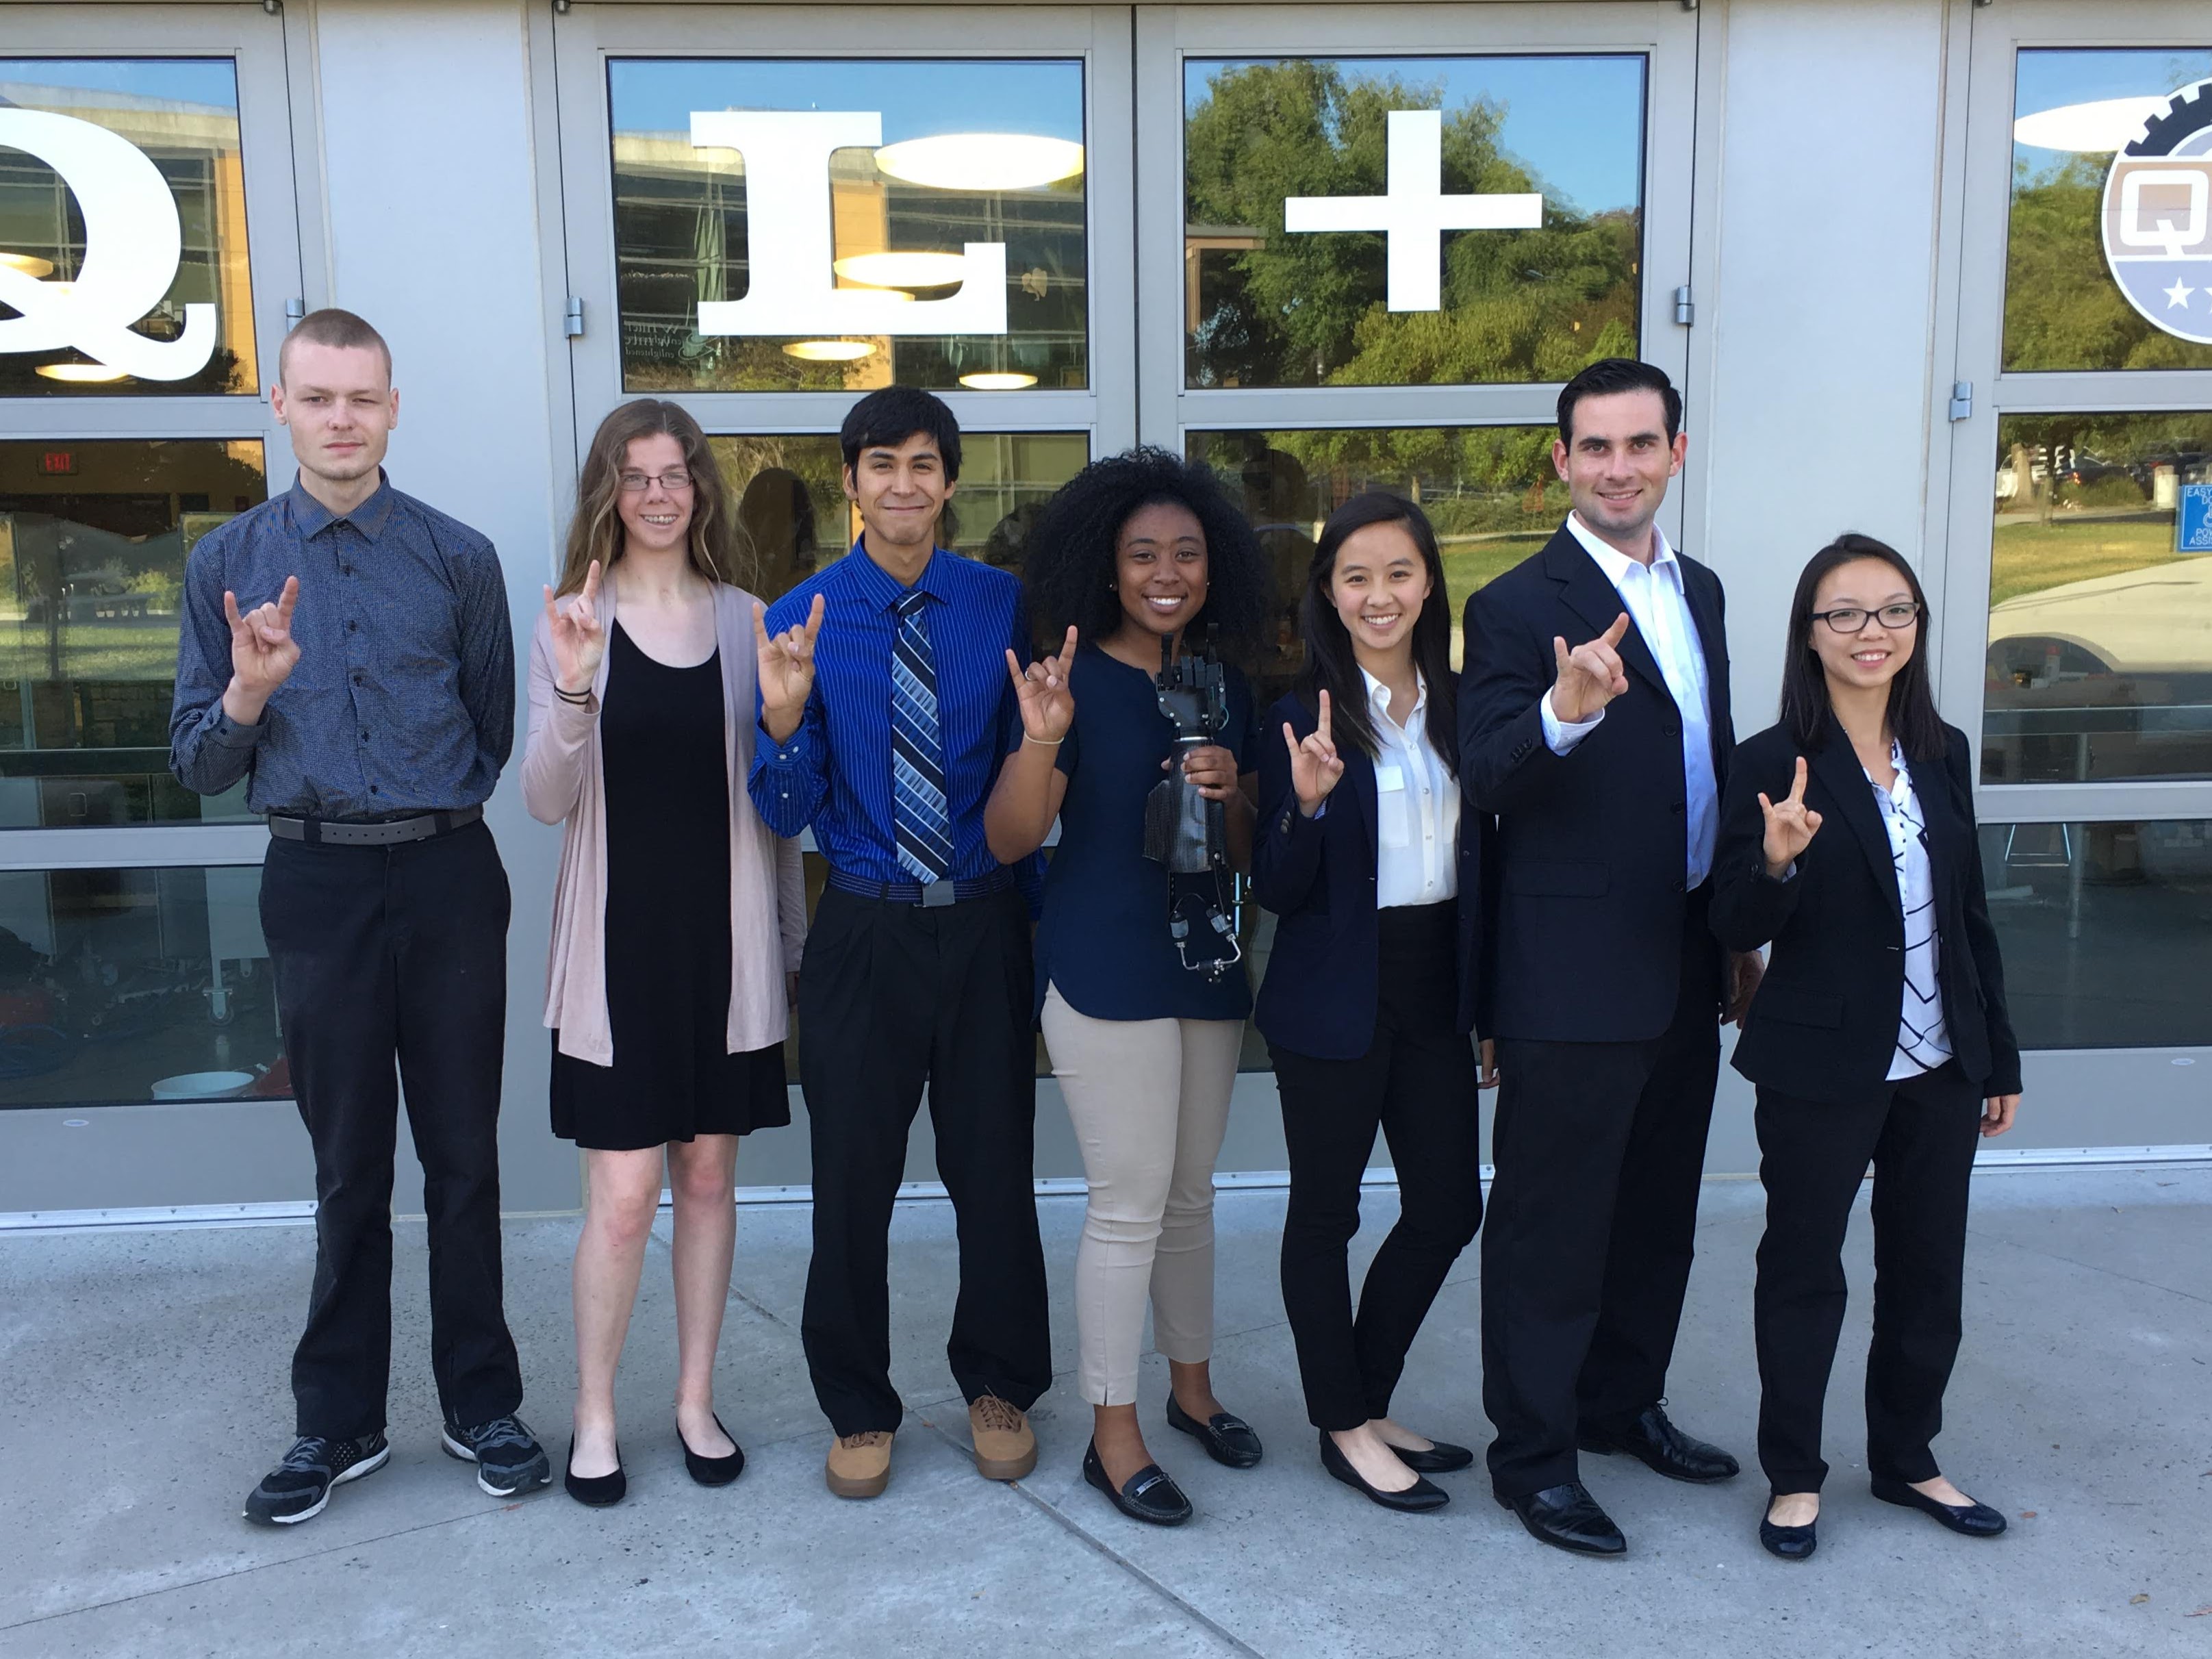
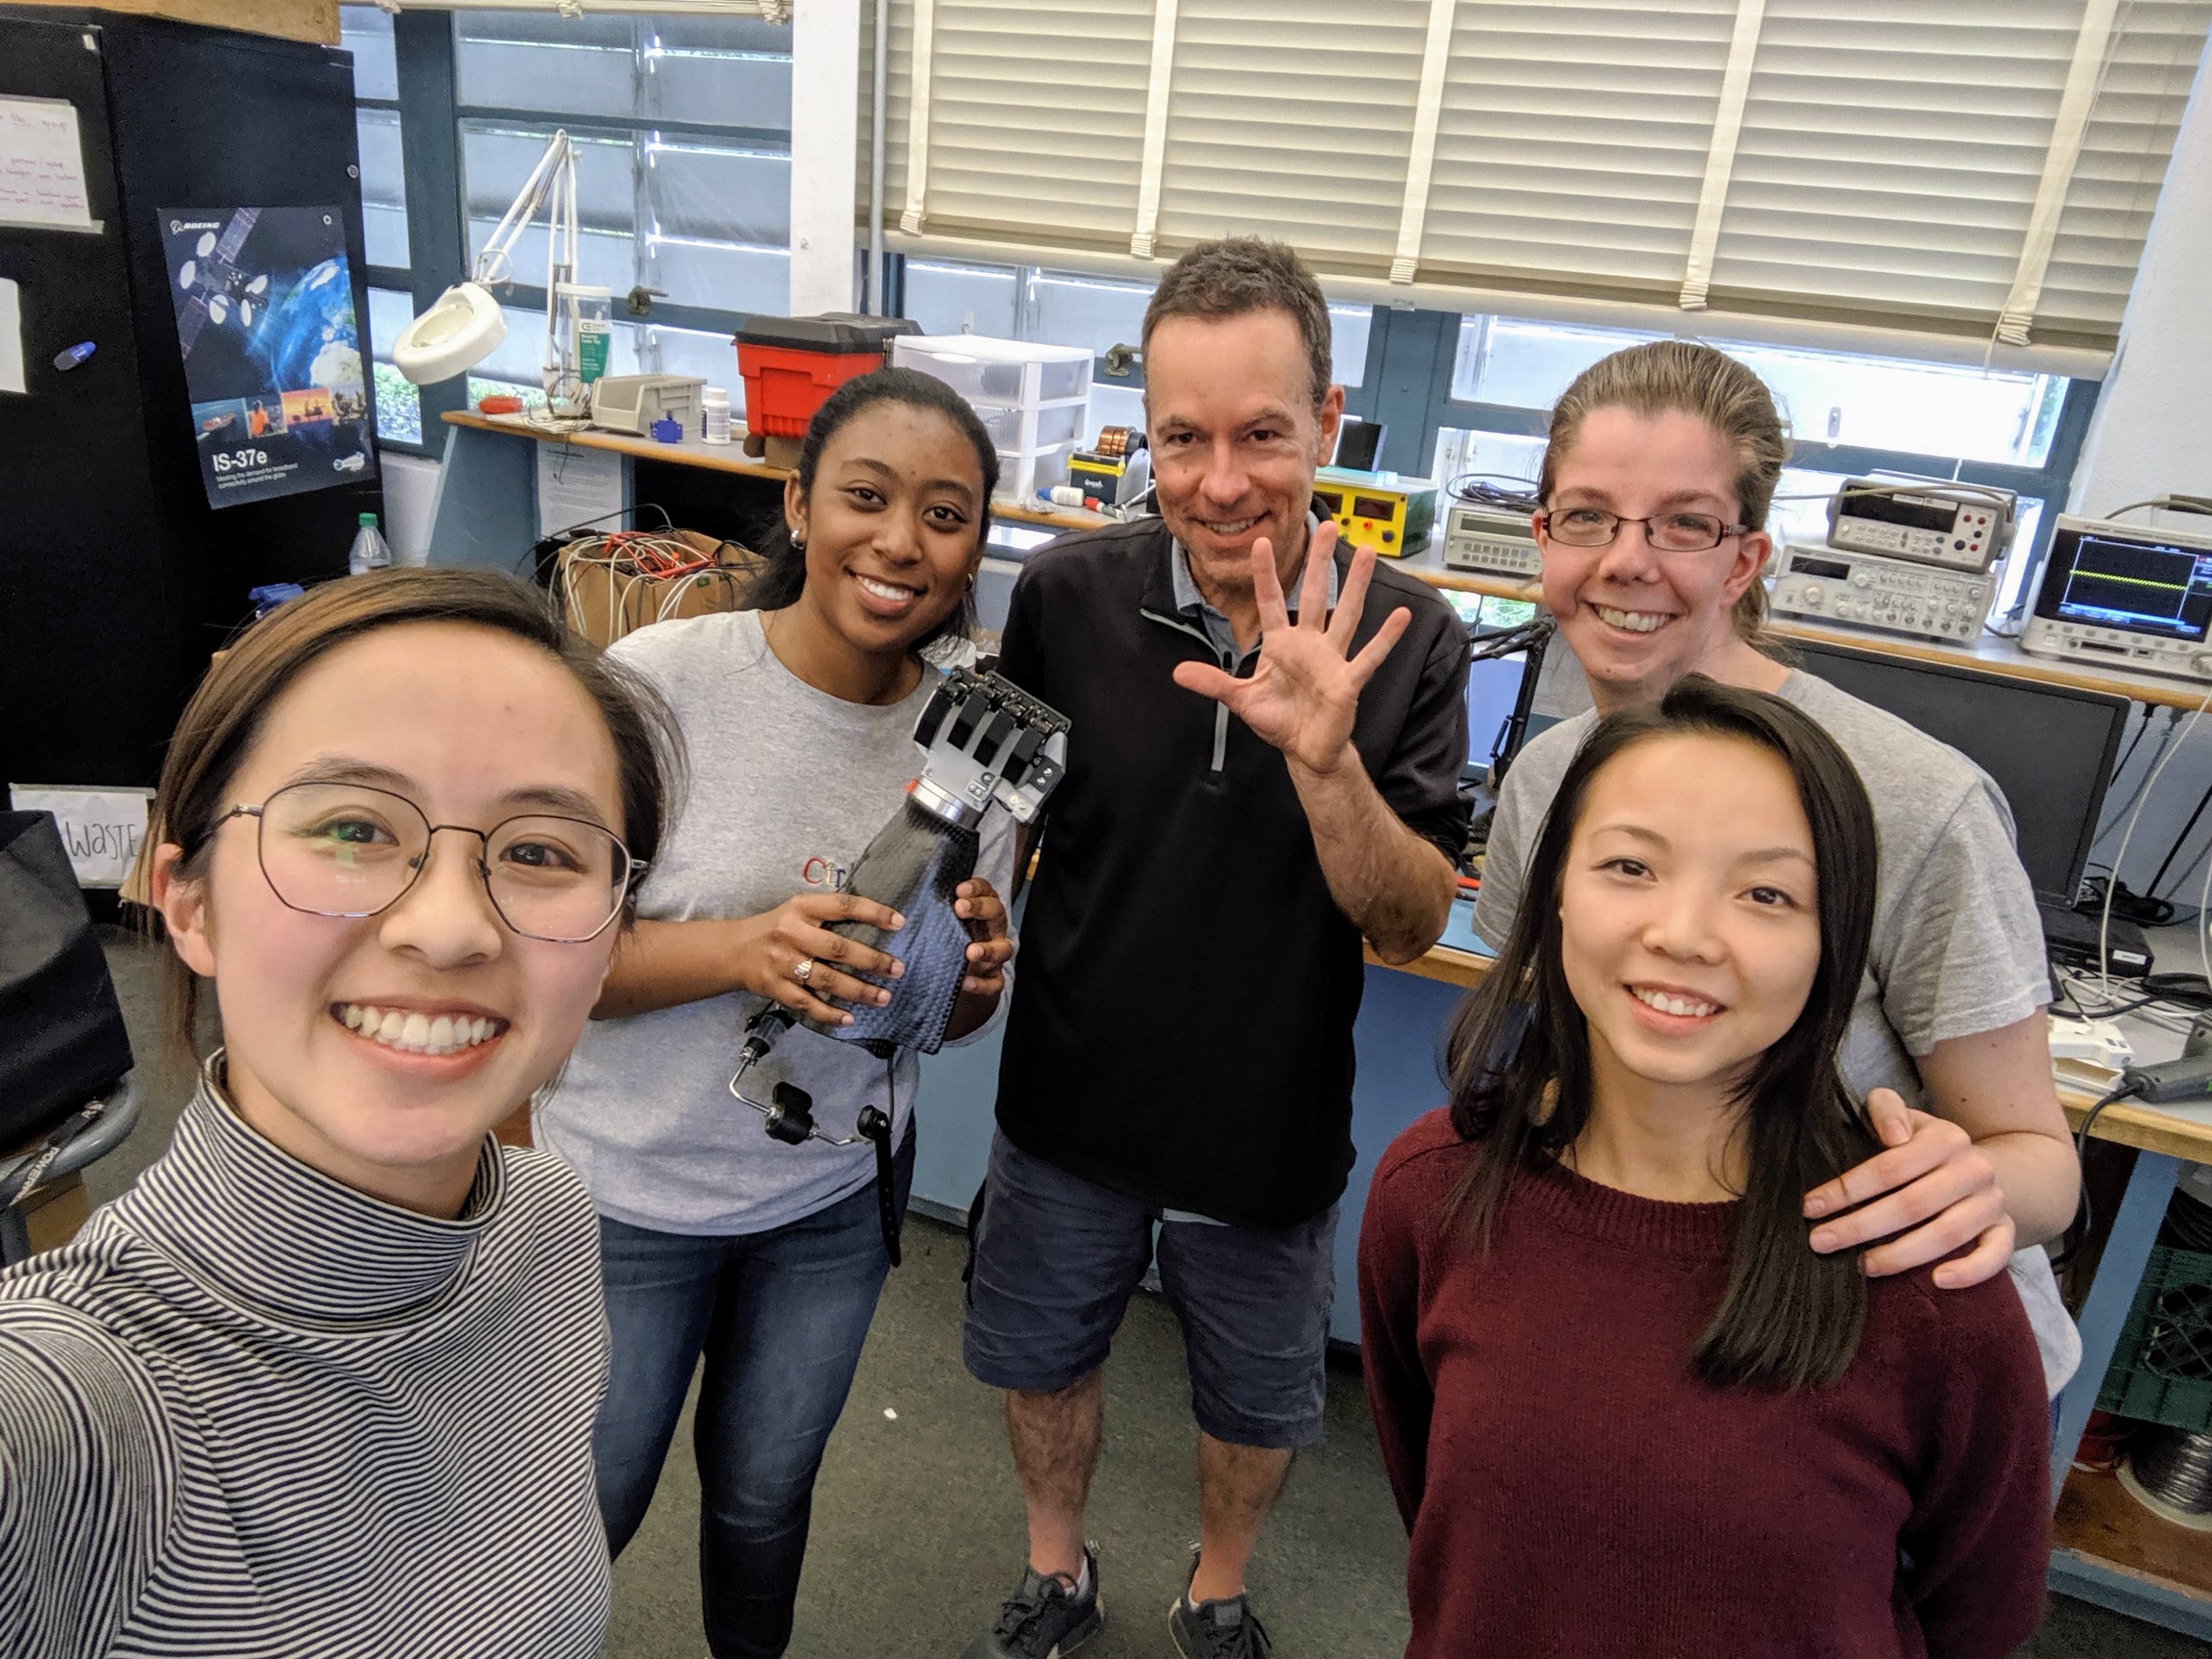
The team was formed under Cal Poly's Quality of Life Plus Student Association, a biomedical engineering focused club that connects student teams with challengers who are in need. The team started off with seven students, ranging from freshman to senior, and from multiple engineering disciplines. The mechanical aspect of the project included the design of the digits and the palm, the wrist connector, and the socket which houses the sensors and the electronics. Due to the complexity of the project and the lack of resources surrounding prosthesis design and manufacturing, we were only able to finish the mechanical aspects of the hand in the first year. However, the members in charge of the electrical and computer engineering aspects were unable to continue the project afterwards, so I took over development work in those areas. The team no longer operated under QLP but instead received funding from CP Connect, Cal Poly MESFAC, and Cal Poly IEEE Student Branch.
Design
Digits
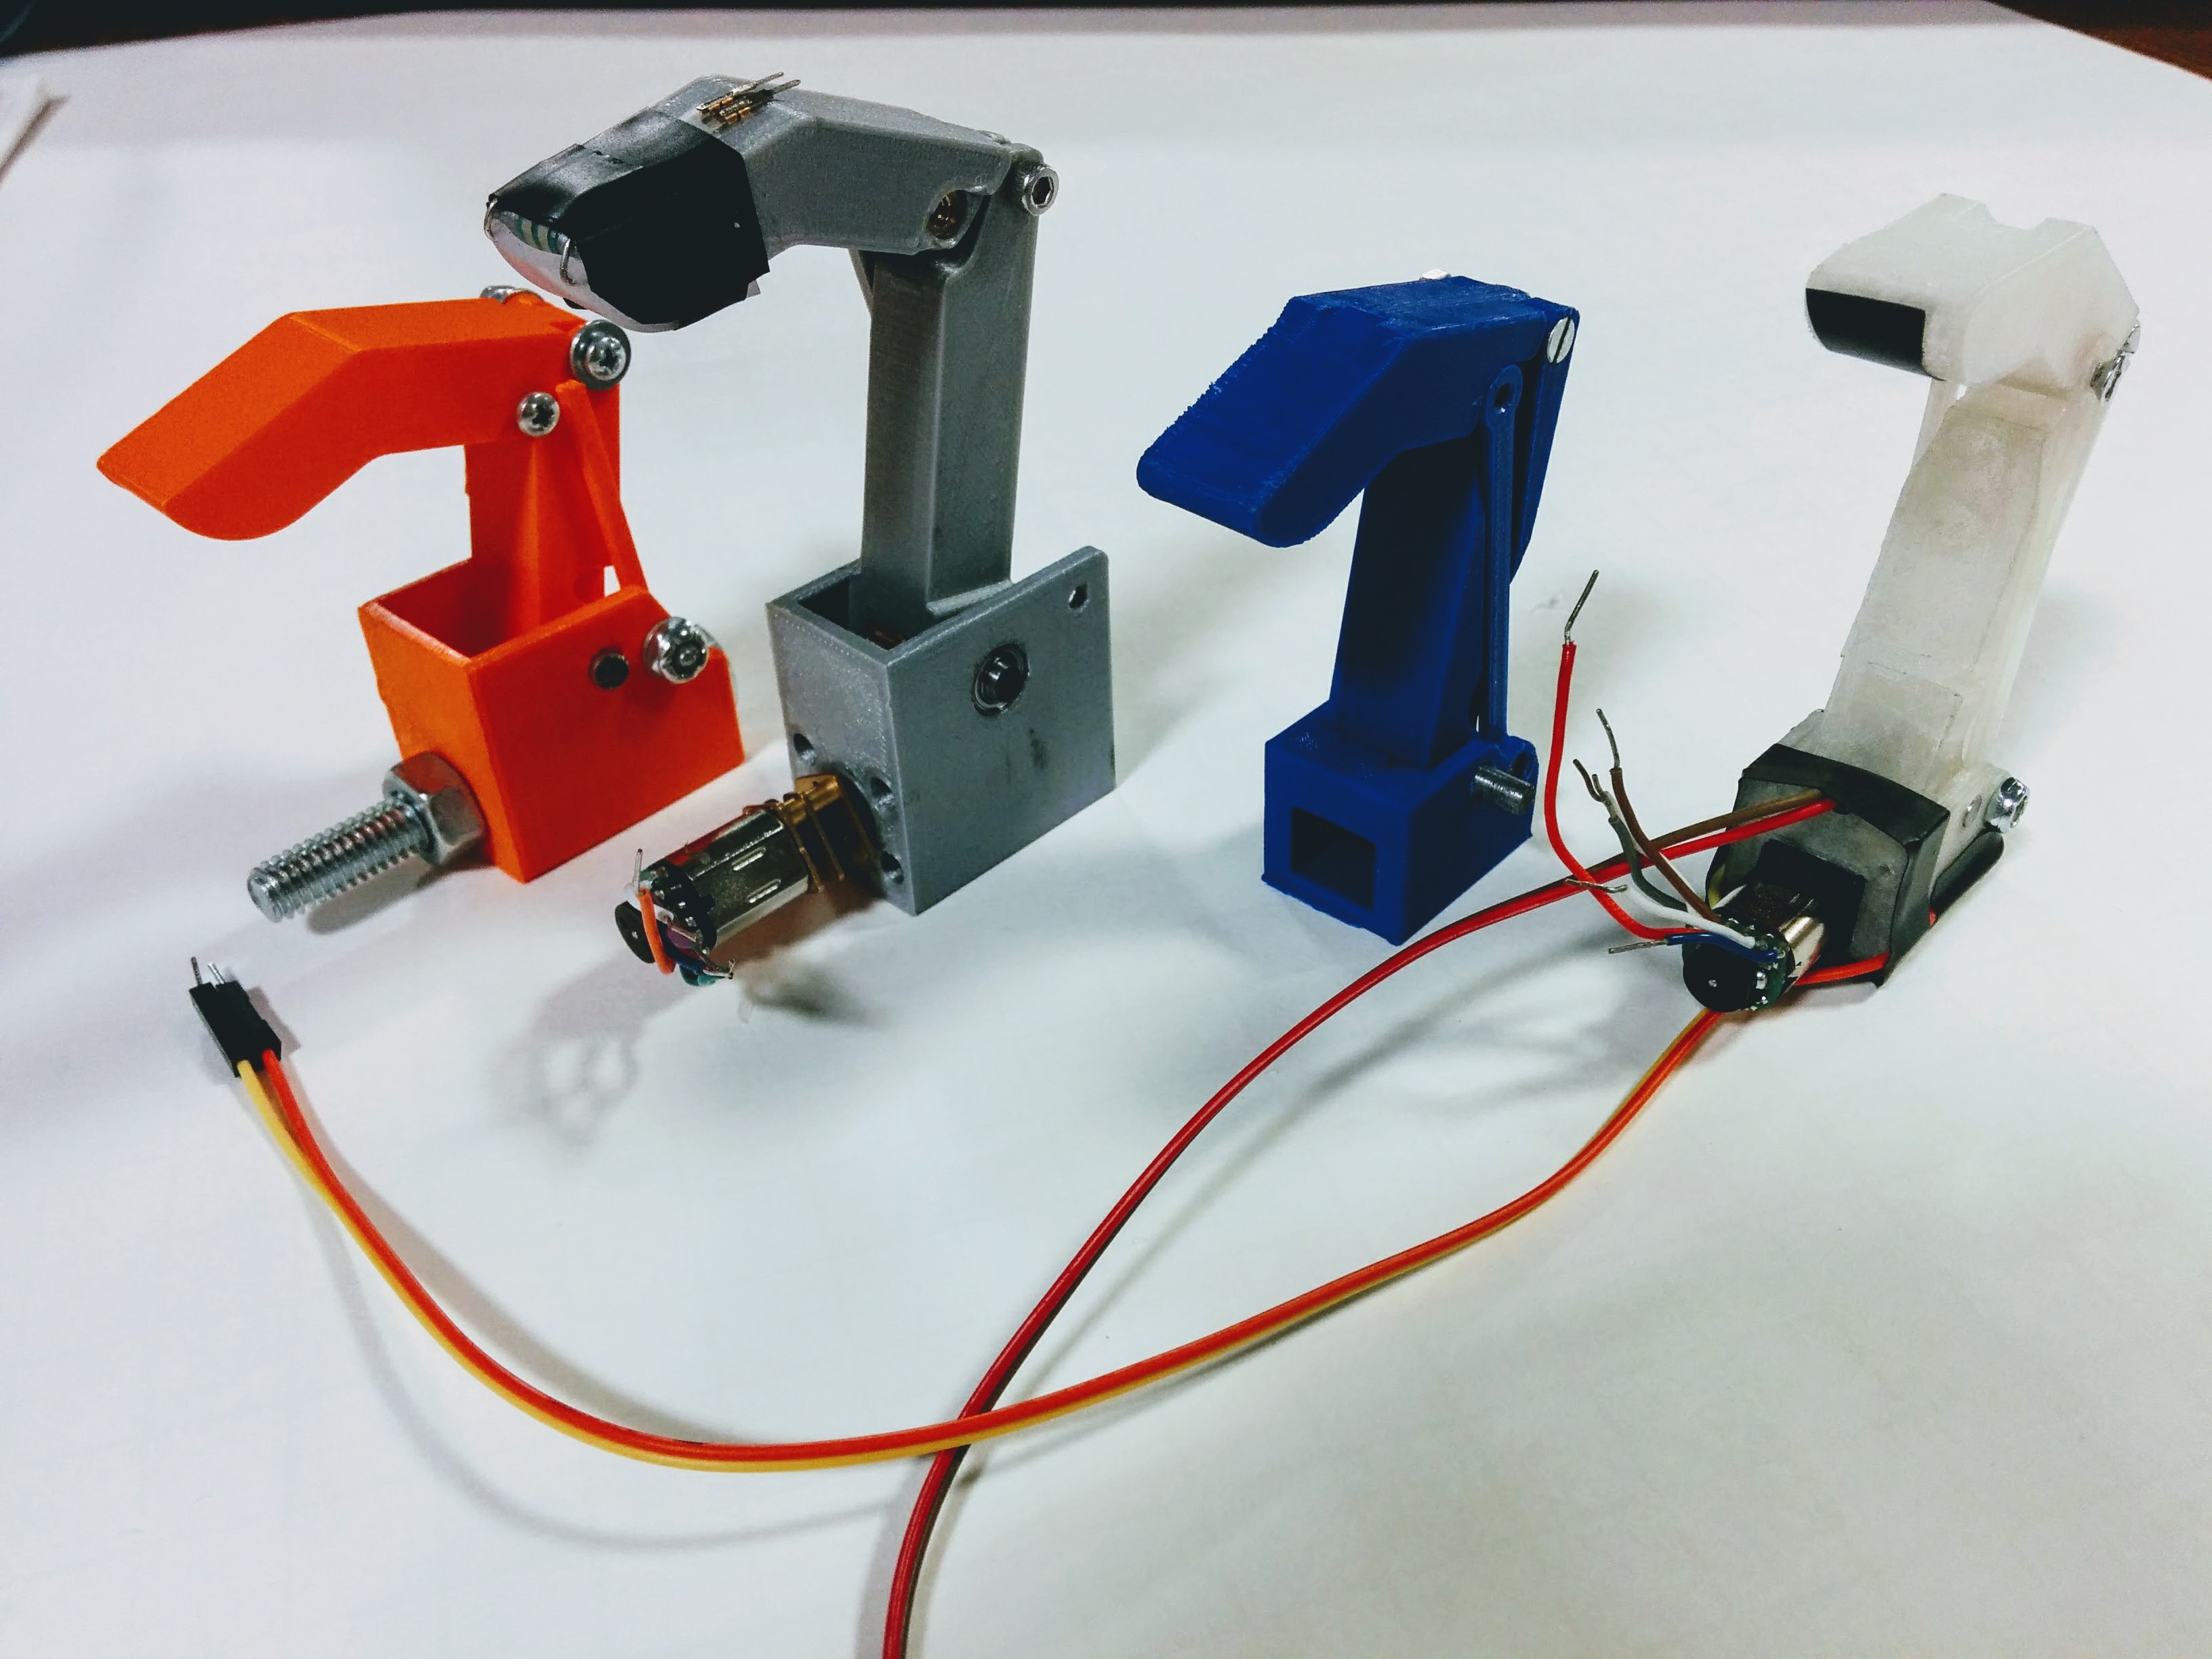
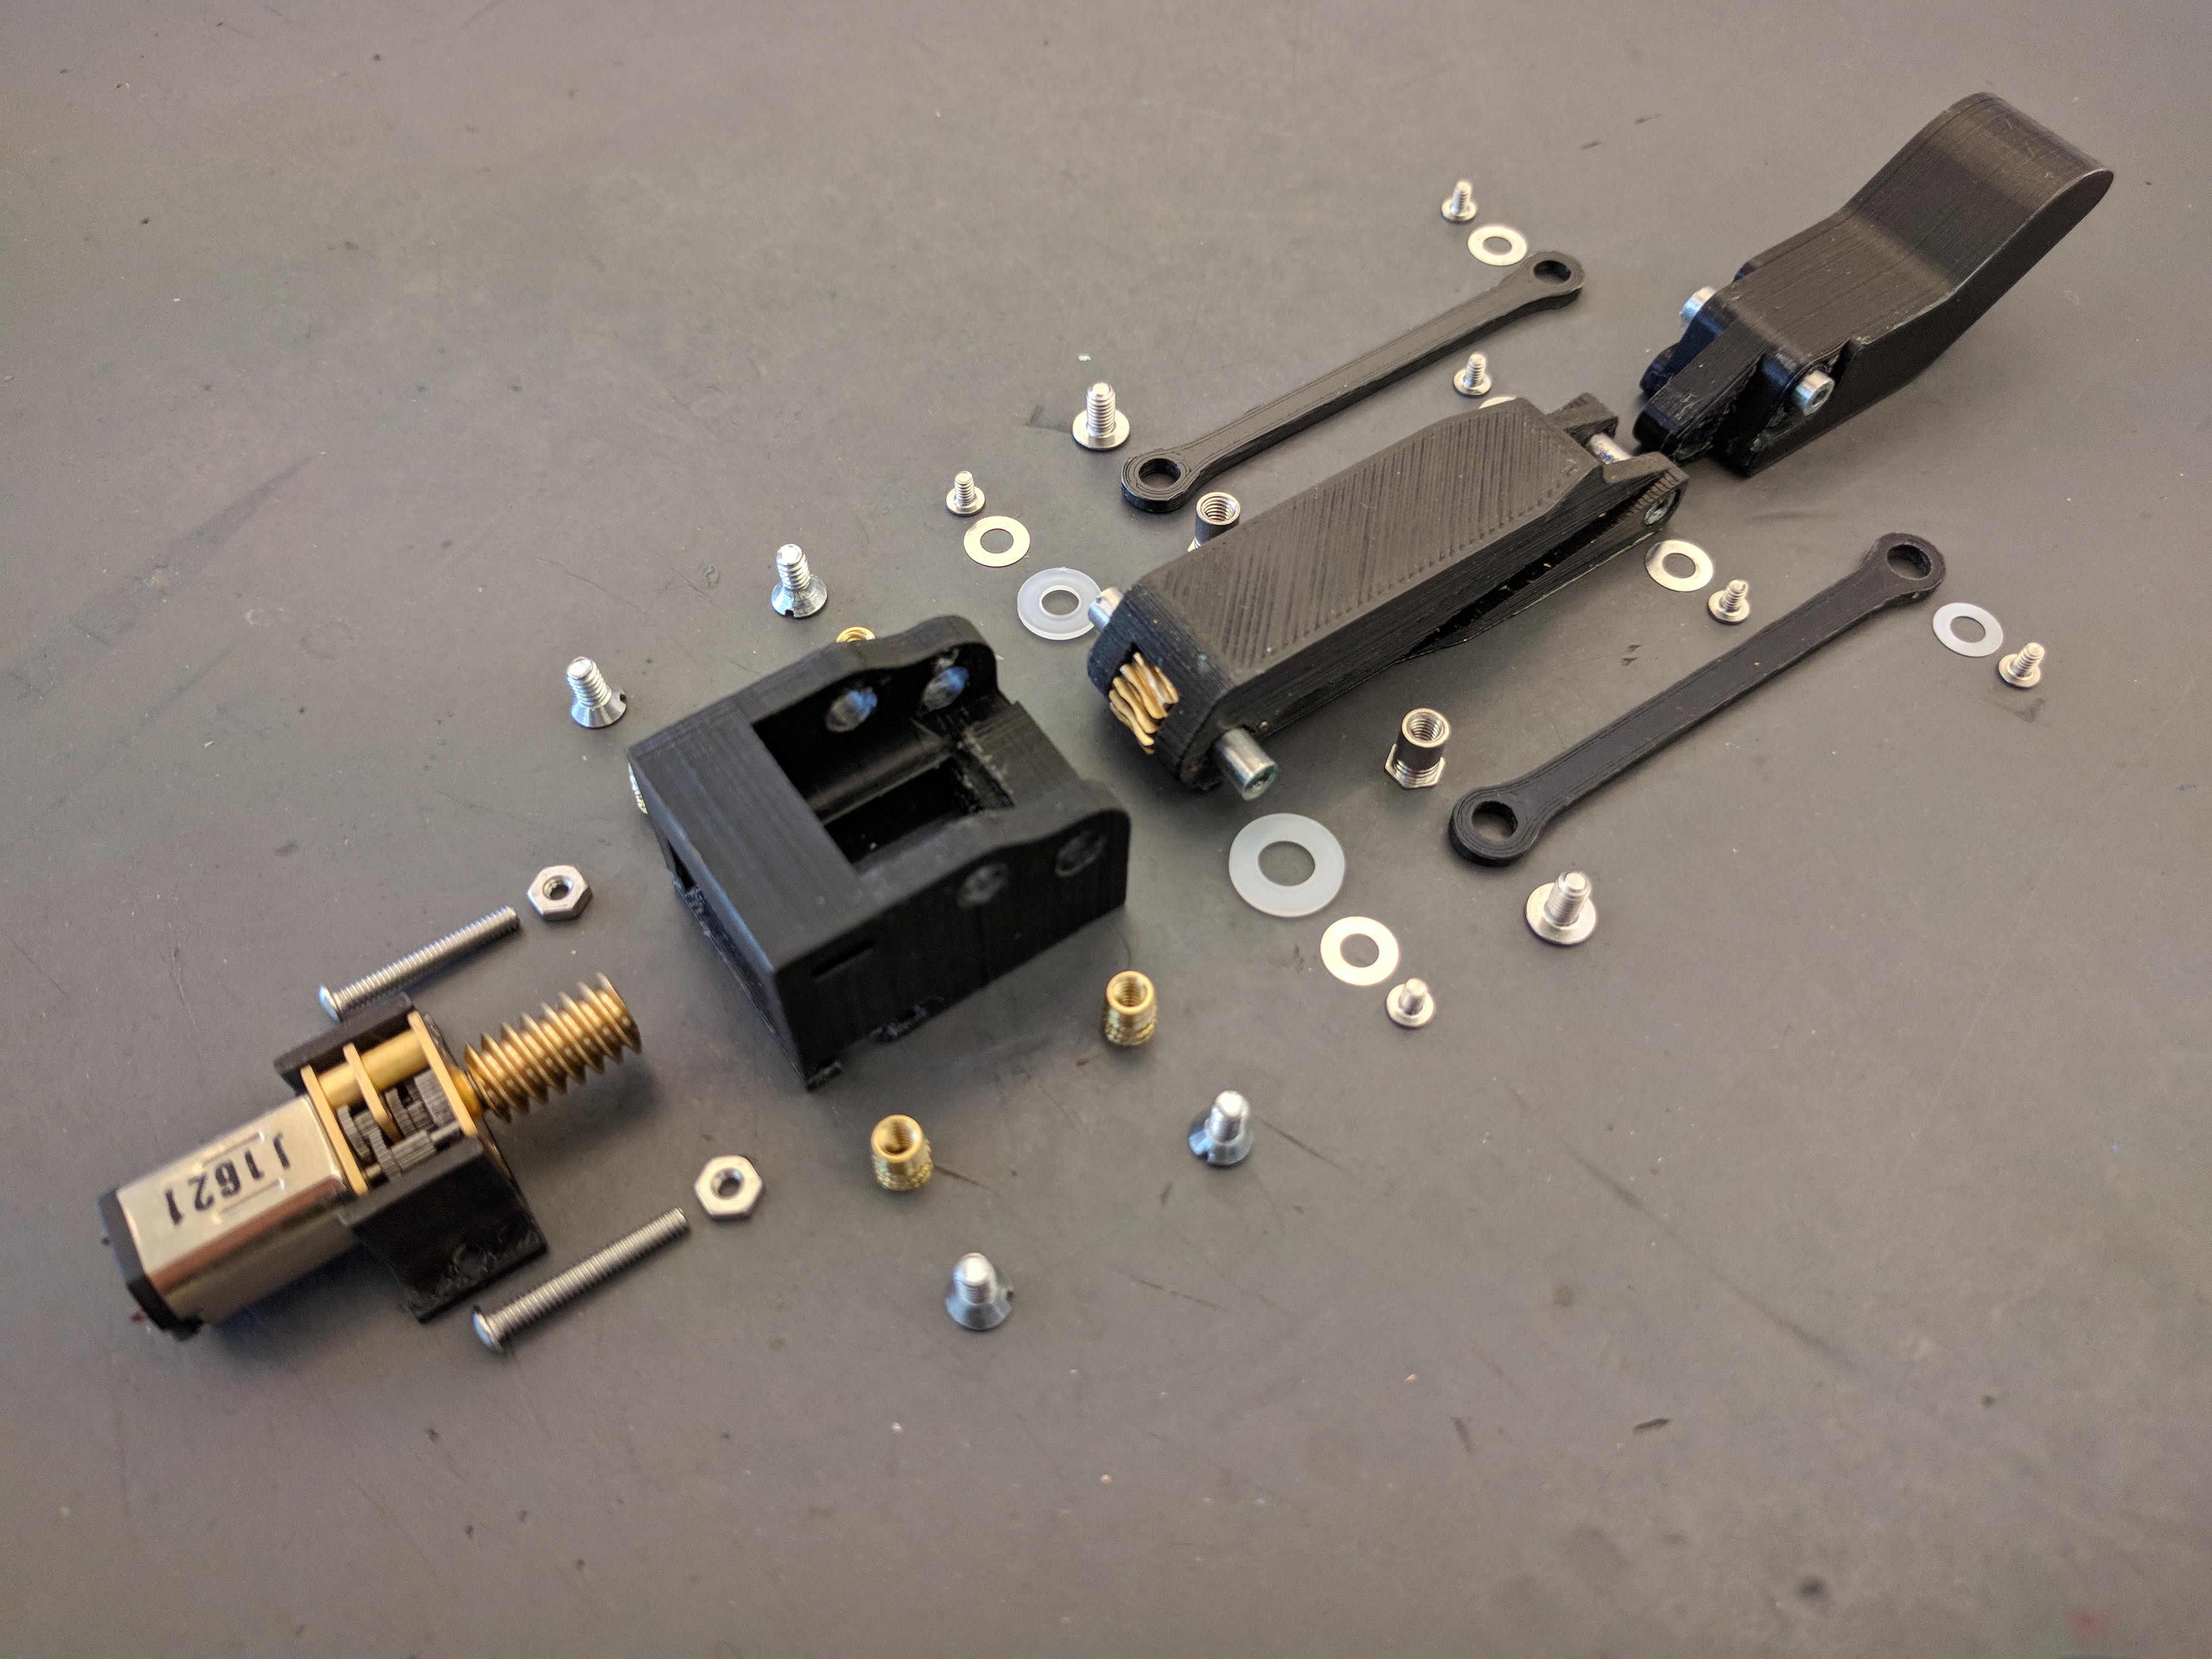
A lot of existing open-source prosthetic hands use servo systems to manipulate the digits for increased dexterity, but we chose to go with a worm-gear and linkage system instead. Using a worm-gear, the digits can be locked even when power is cut, increasing digit strength and reducing power usage. The digit emulates the natural curling of a finger via a 4-bar linkage system. The linkage was designed to be an intentional breaking point as it is a small piece that can be easily replaced even in the fully assembled hand.
Electrical System
It was important to ensure the digits do not try to rotate past their intended range of motion to protect the mechanical hardware and motors from breaking and to reduce wear and tear. However, we tried many ways to implement a safety mechanism via limit switches, even using tiny surface mount buttons or tiny potentiometers, and the resulting designs were all rather unreliable. So, we decided to implement the safety mechanism via motor current sensing instead. Since the digits were actuated by DC motors, we found motor drivers that allow us to add a very small resistor in-line to measure the motor current. When the digit is stopped (either because it has reached its limit of rotation or is blocked by an object), the motor will draw more current in response. By monitoring the voltage across the in-line resistor, we can determine when to cut power to the motors. This feature also allows increased versatility in the grip patterns we can achieve with just two simple controls: open and close. For instance, the digits can conform to differently shaped objects, or the user could keep only the pointer digit from closing for a typing grip pattern. And just in case you were wondering, no, you cannot give someone the finger since the middle and ring digits are controlled with the same motor driver (5 is not a very nice number in the electronics world, unfortunately).

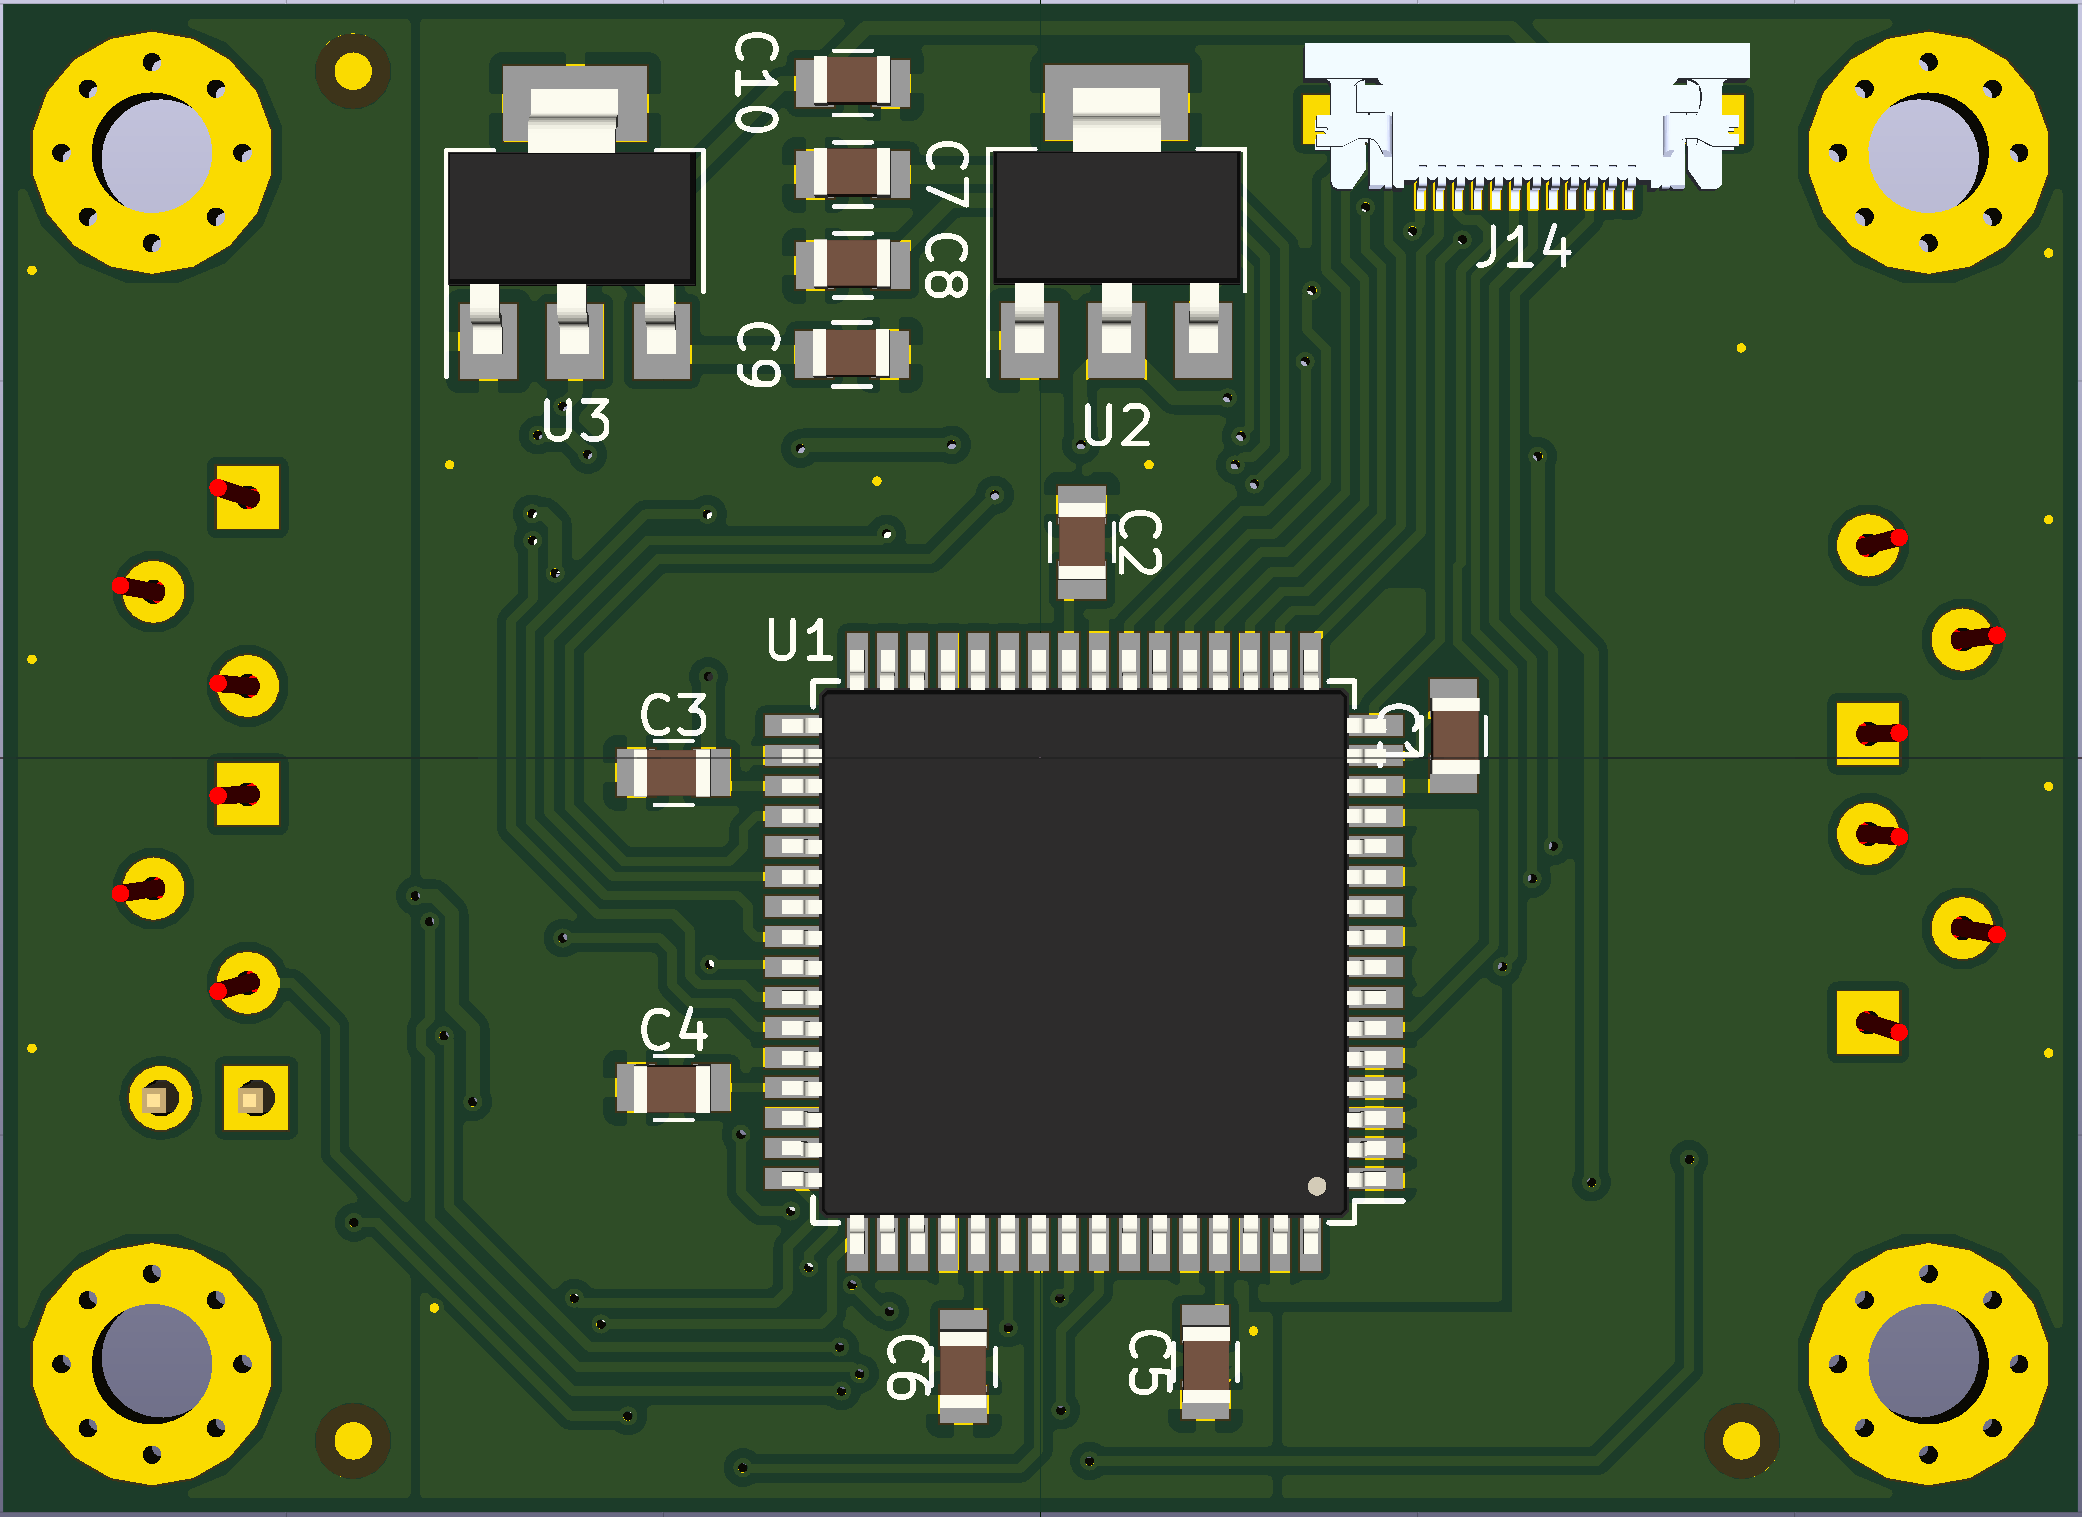
PCBs
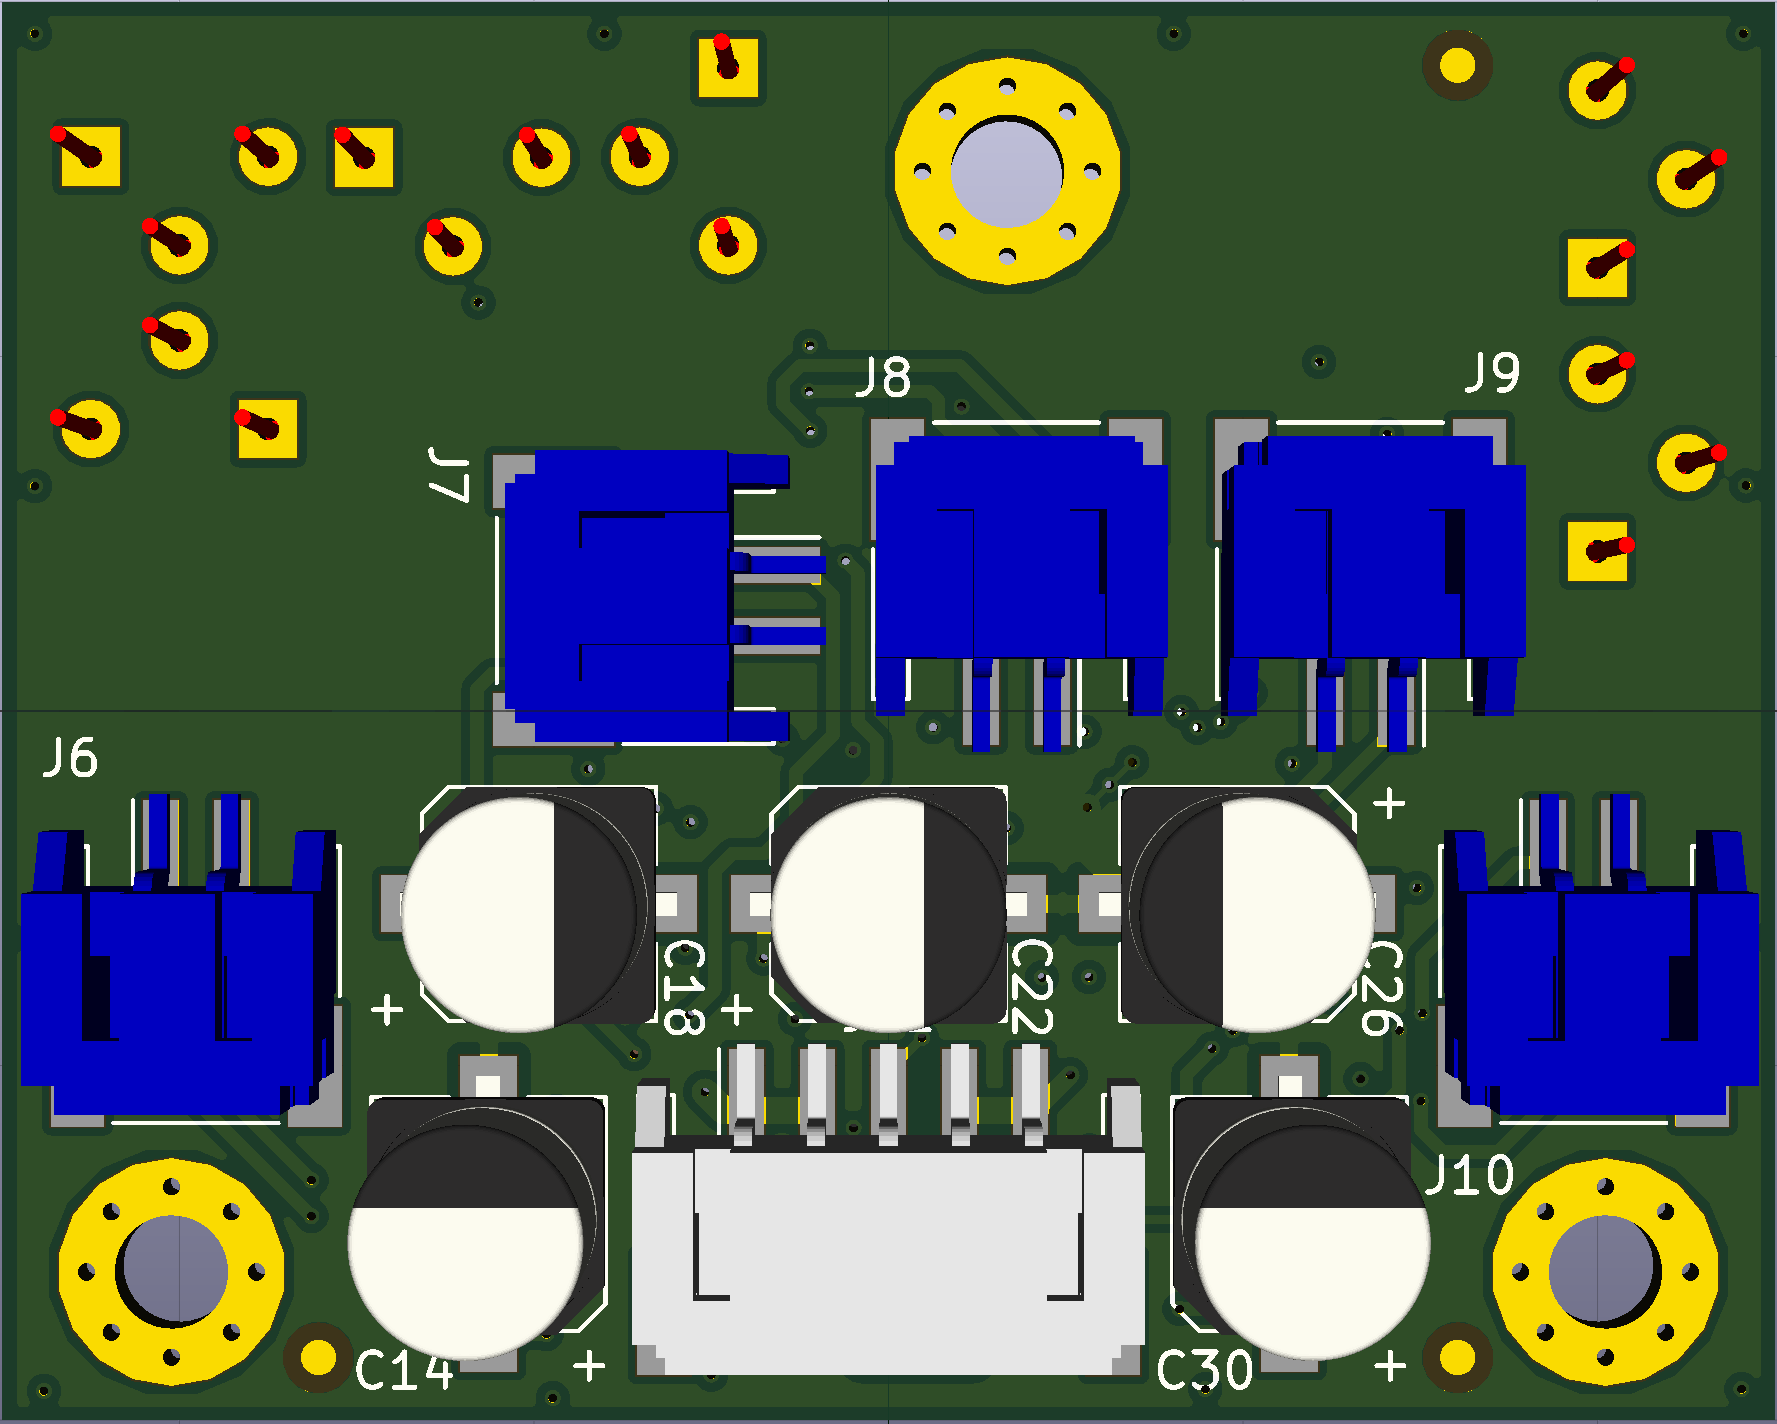
Once we have tested the motor controller and current sensing subsystem, it was time to put everything together. Due to time and financial constraints, we really only had one shot at manufacturing the PCBs. I used KiCAD for designing the two boards. The motor controller board sits inside the palm and houses the motor driver and current sensing system. The microcontroller board sits inside the socket and houses the mircocontroller, signal prep-processing circuitry, debug LEDs, power distribution system, and miscellanious communication ports. We used the reflow oven at the Cal Poly IME Department for the assembly using the following procedure: apply solder using a stencil, reflow, apply flux and place components, then reflow again.
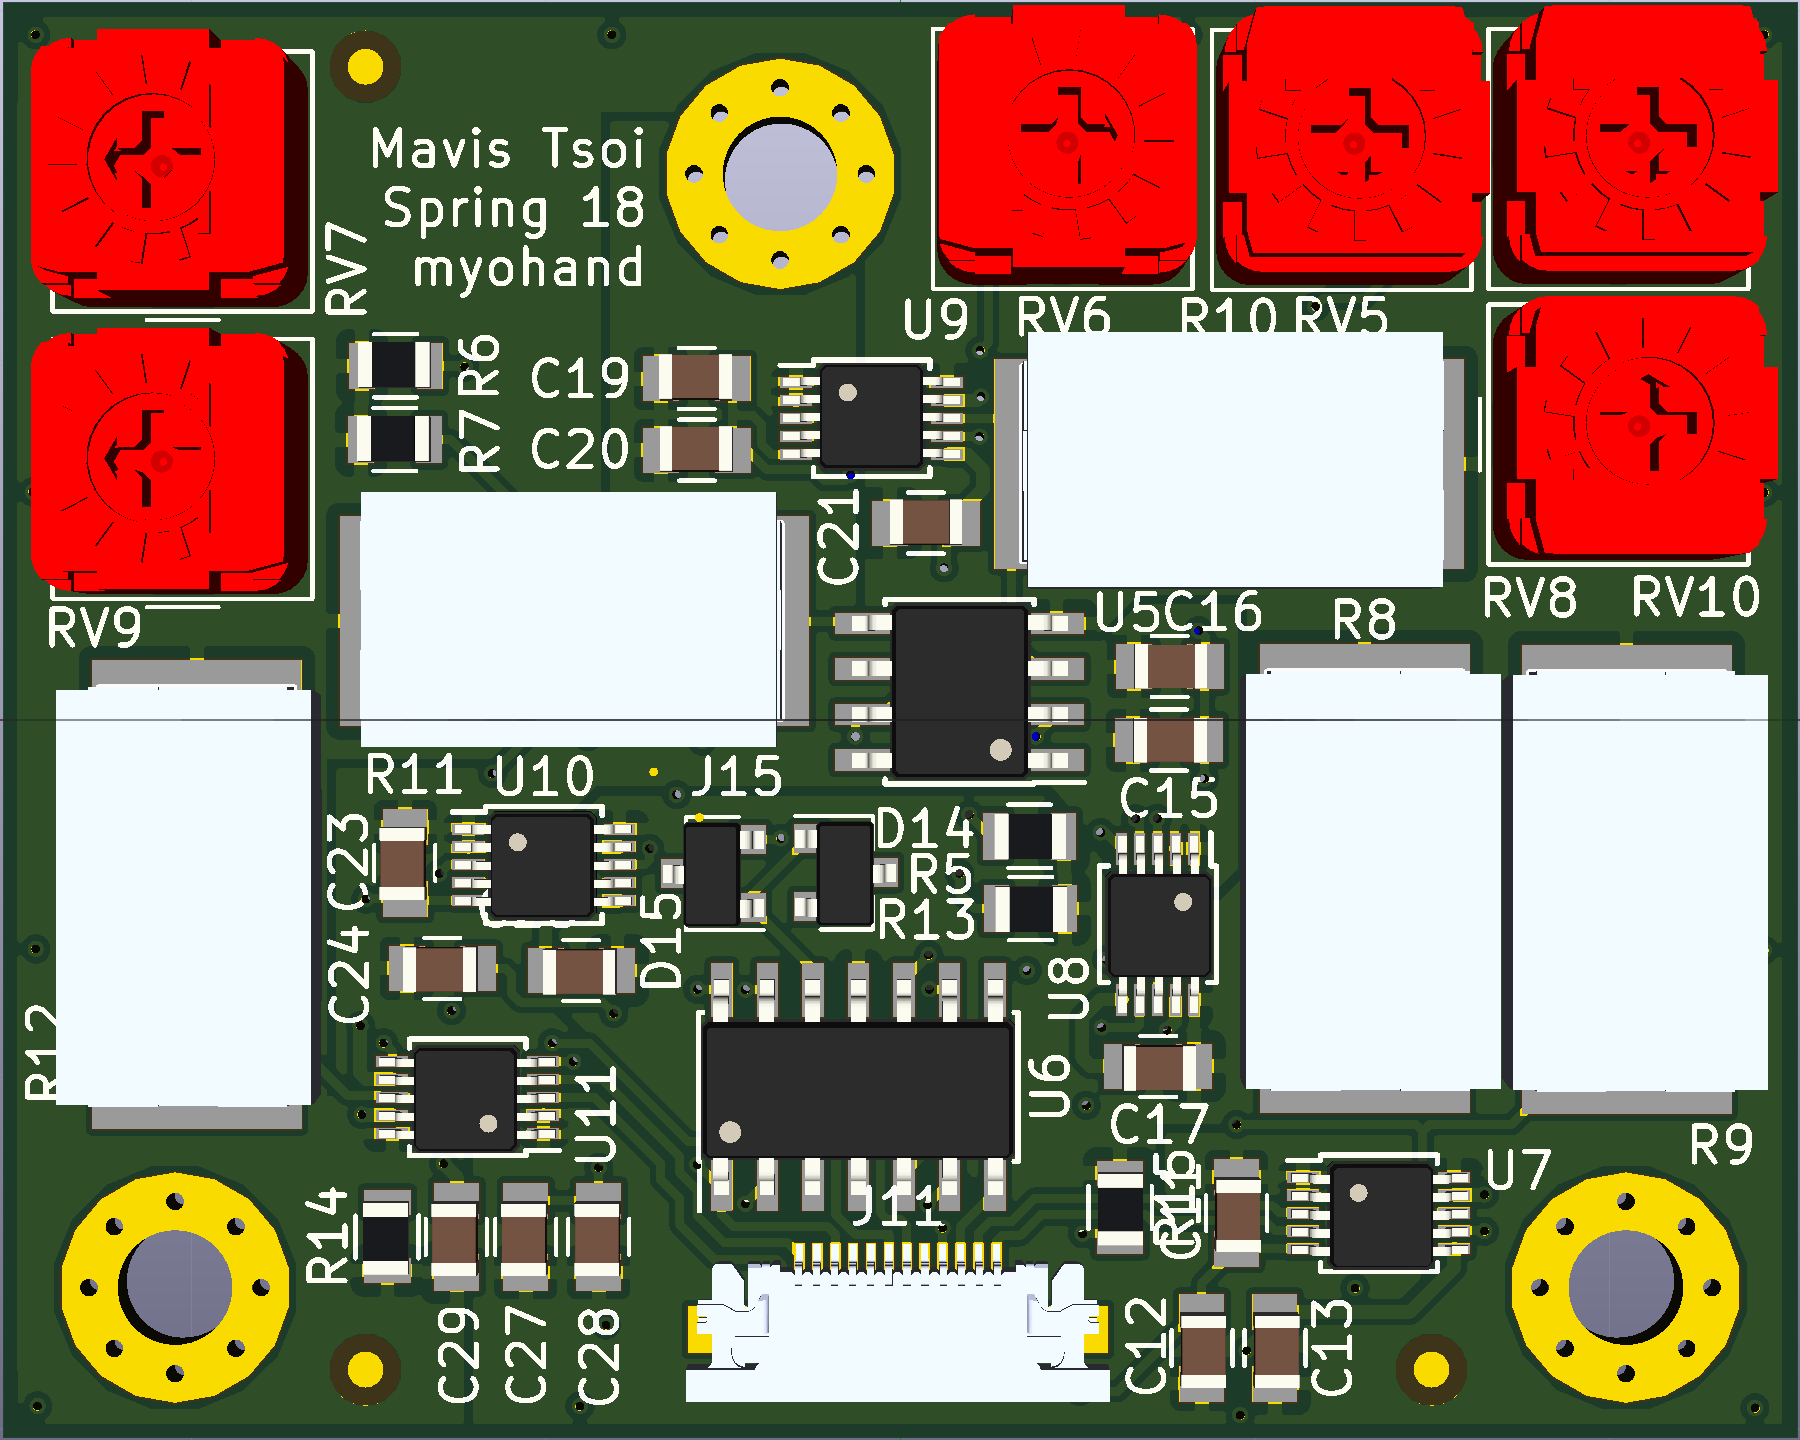
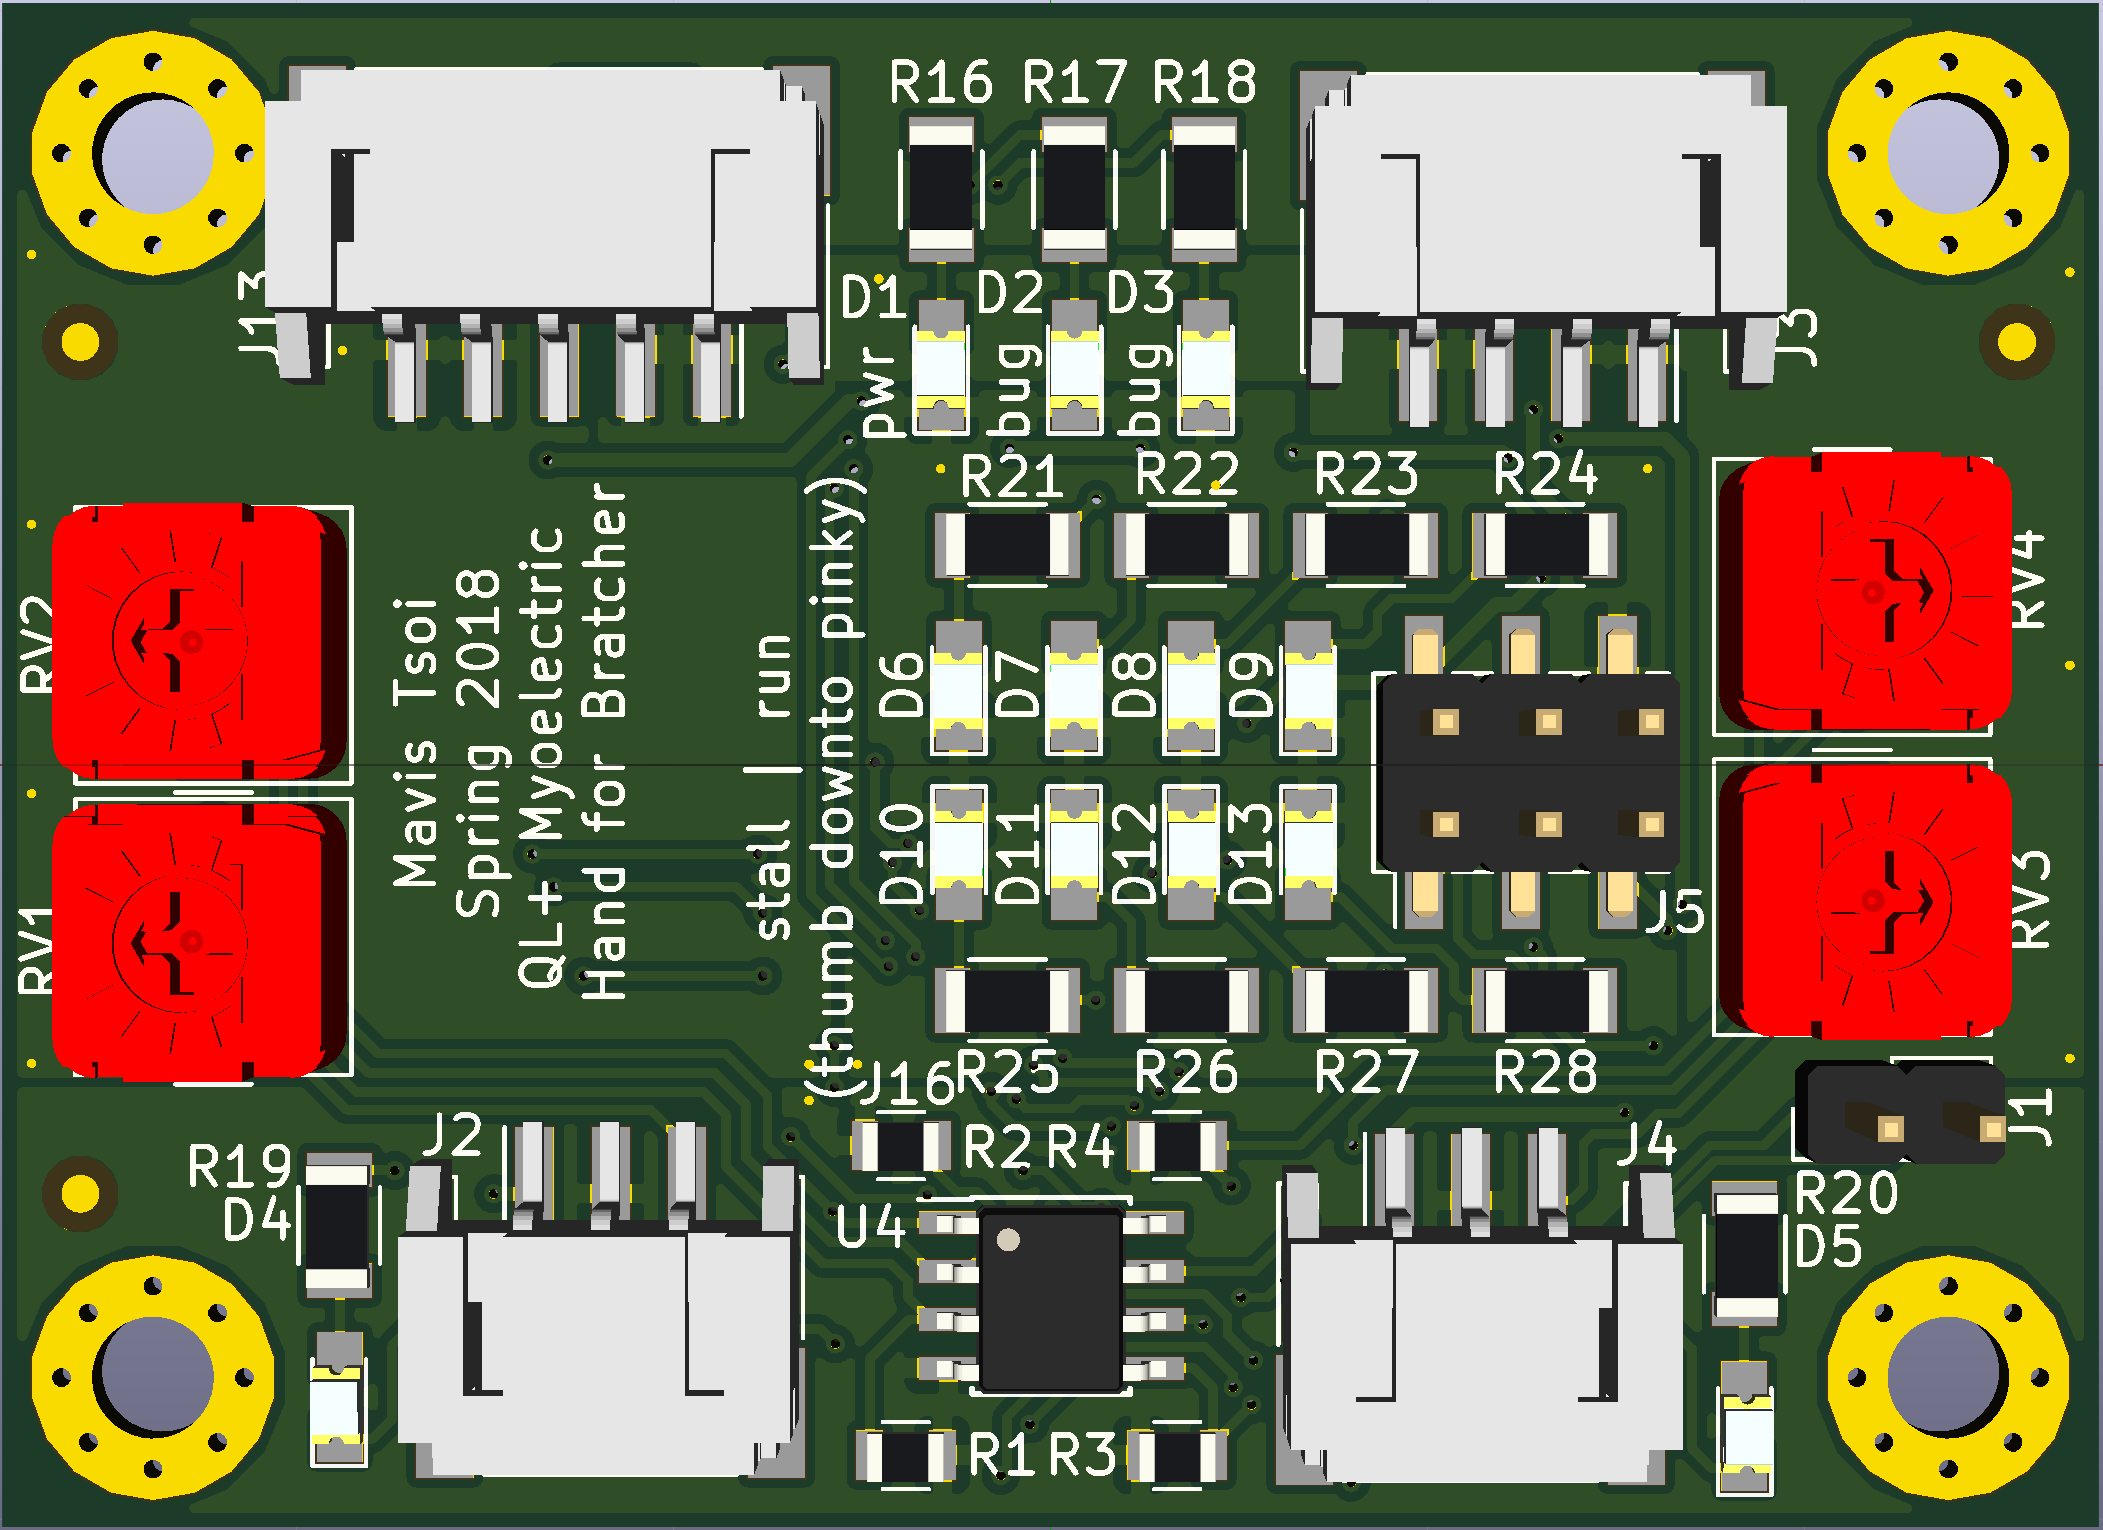
Because we could not meet with Bratcher often (geographical constraints), we didn't have much idea of how the input signals look other than that it will be between 0V and 5V. So, I made sure the system is flexible and can adapte to changes. For instance, I implemented an amplification circuit so that we can tune the gain or attenuation of the input signals easily. Also, it was a good thing I placed a bunch of debug LEDs and routed out extra communication pins to aid in the firmware development process.
Data Collection and Filter Design
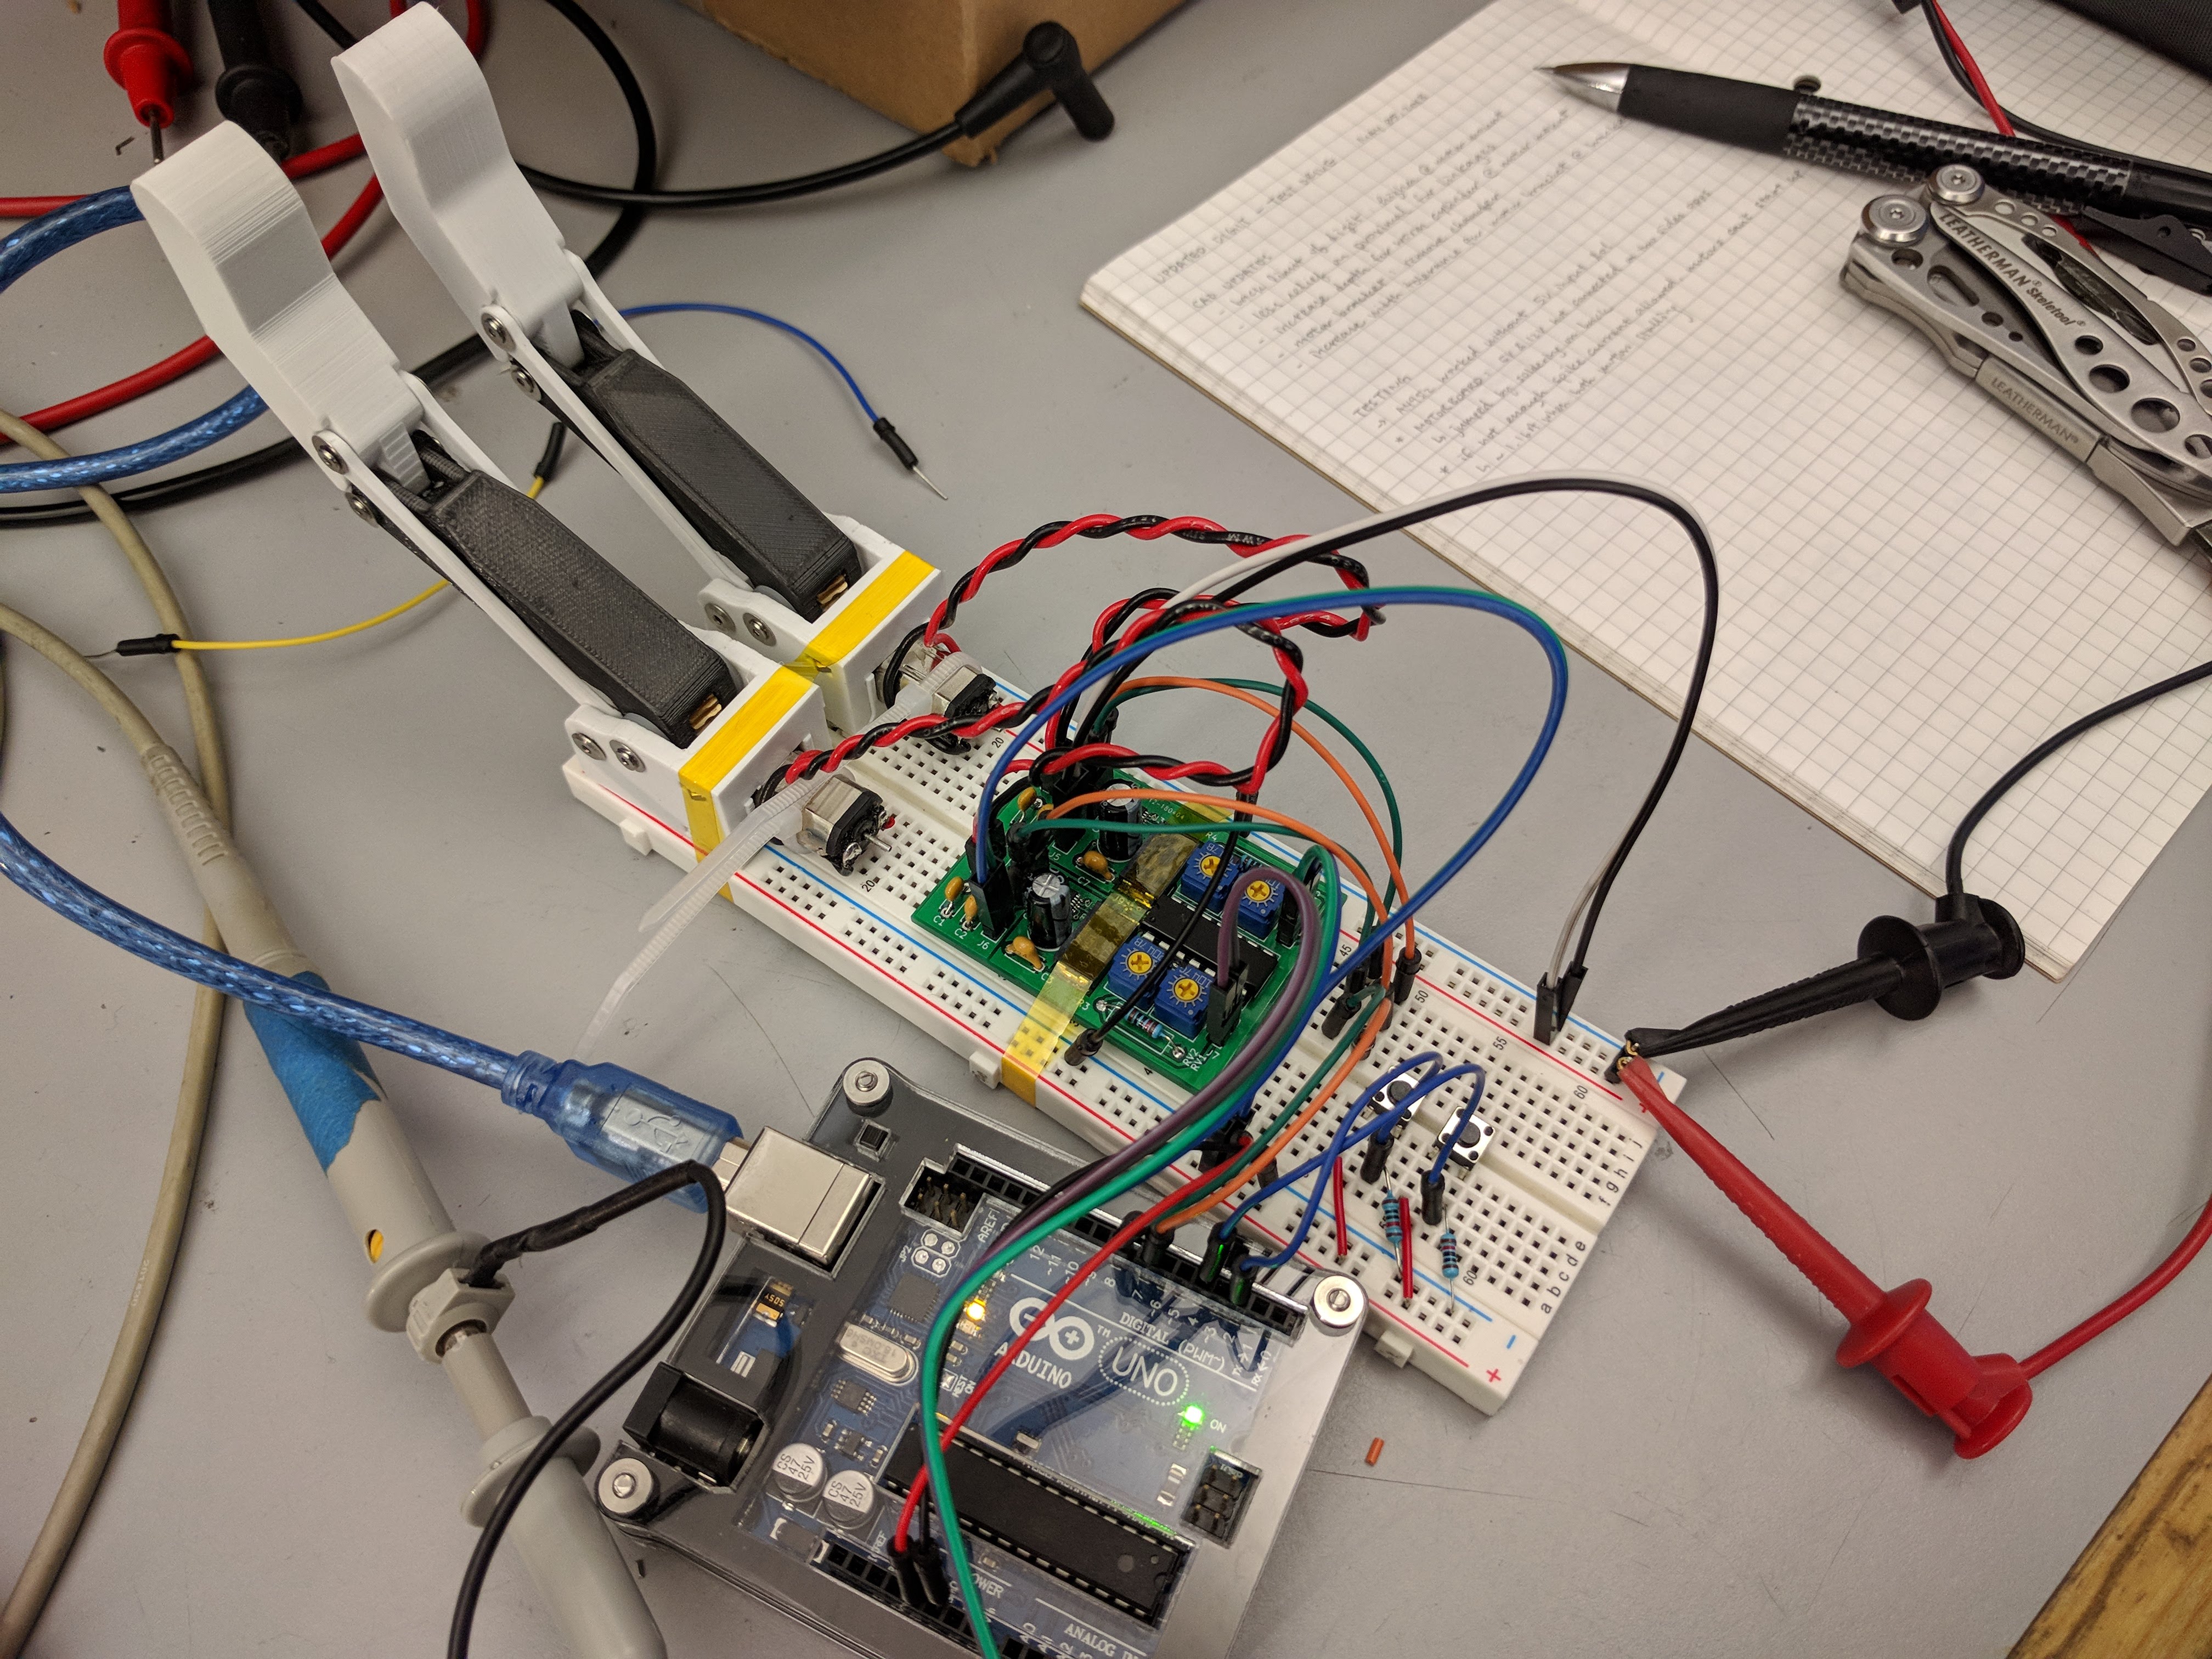
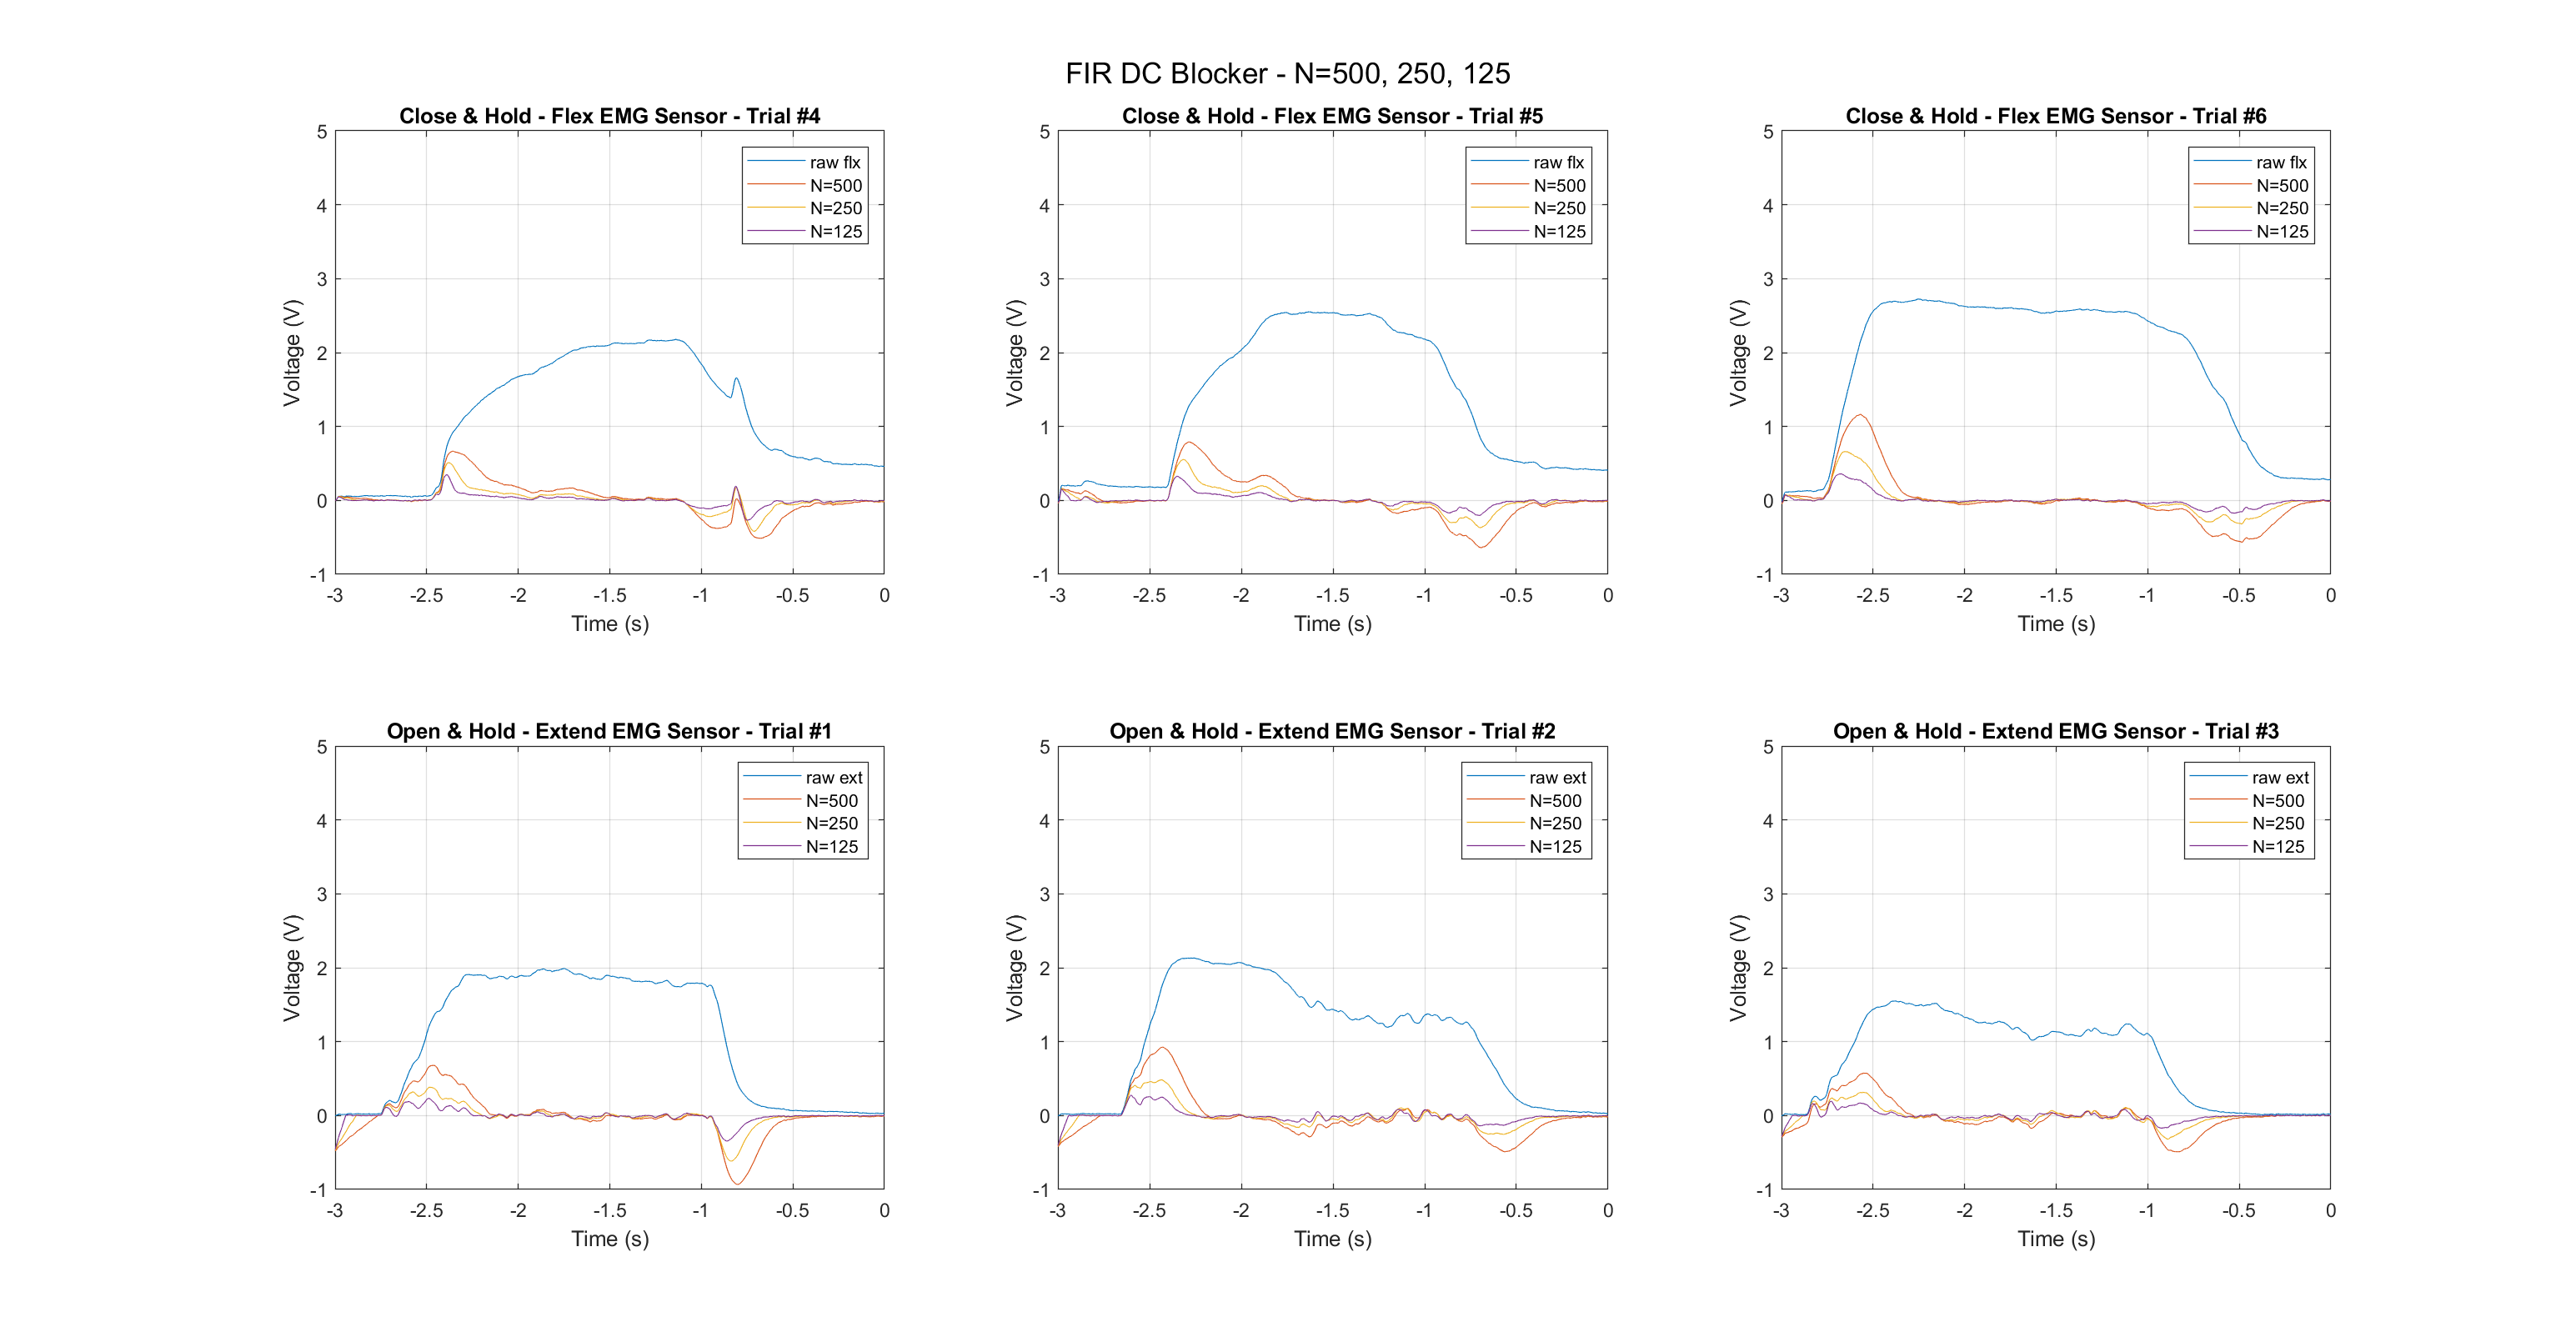
The electrical system was completed in Spring 2018 (second year of the project). In the following summer, I began developing the firmware. The first LED blink took roughly 6 hours, since I've never done any embedded firmware development outside of Arduino at this point, and I made the mistake of developing without a dev board (oops, lesson learned!). I took some time learning how to manipulate bits, read the manual, set registers, and eventually was able to set up the analog to digital converter on the microcontroller. Then, in Fall 2019, we were able to meet with Bratcher to finally collect some data! I wanted to characterize the EMG (electromyographic) signals from Bratcher's residual limb. Using concepts I learned fresh that quarter from my Digital Signals and Systems class, we had Bratcher perform wrist flexion or extension motions to activate the two EMG sensors in the socket and collected the sensor data using an oscilloscope. Then, I used Matlab to analyze the data and developed a digital filter to remove the wandering baseline that was likely a result of motion artifact. The filter was then implemented in real time on the microcontroller, and the input signals were debounced to generate "open", "close", or "idle".
Results
Testing
We decided to limit the grip patterns to cylindrical grasp (for wine bottles and generally holding onto objects), pointer (for typing), and lateral pinch (for holding flat objects). A finite state machine was used to run the model; it takes in an open, close, or idle signal to control digit movement, with each digit taking into consideration the current sensing safety mechanism. Using the data collected, we could simulate Bratcher controlling the system by feeding in the signal regenerated using the Analog Discovery 2. We also took this chance to refine the mechanical design and improve its robustness. Below is a demo video of the full system using the simulated signals. Two buttons were used to send in a wrist flexion or wrist extension signal (as shown on the screen); the LEDs on the borad flashes red once over current is detected and the digits are in "stopped" mode.
Final Preparation
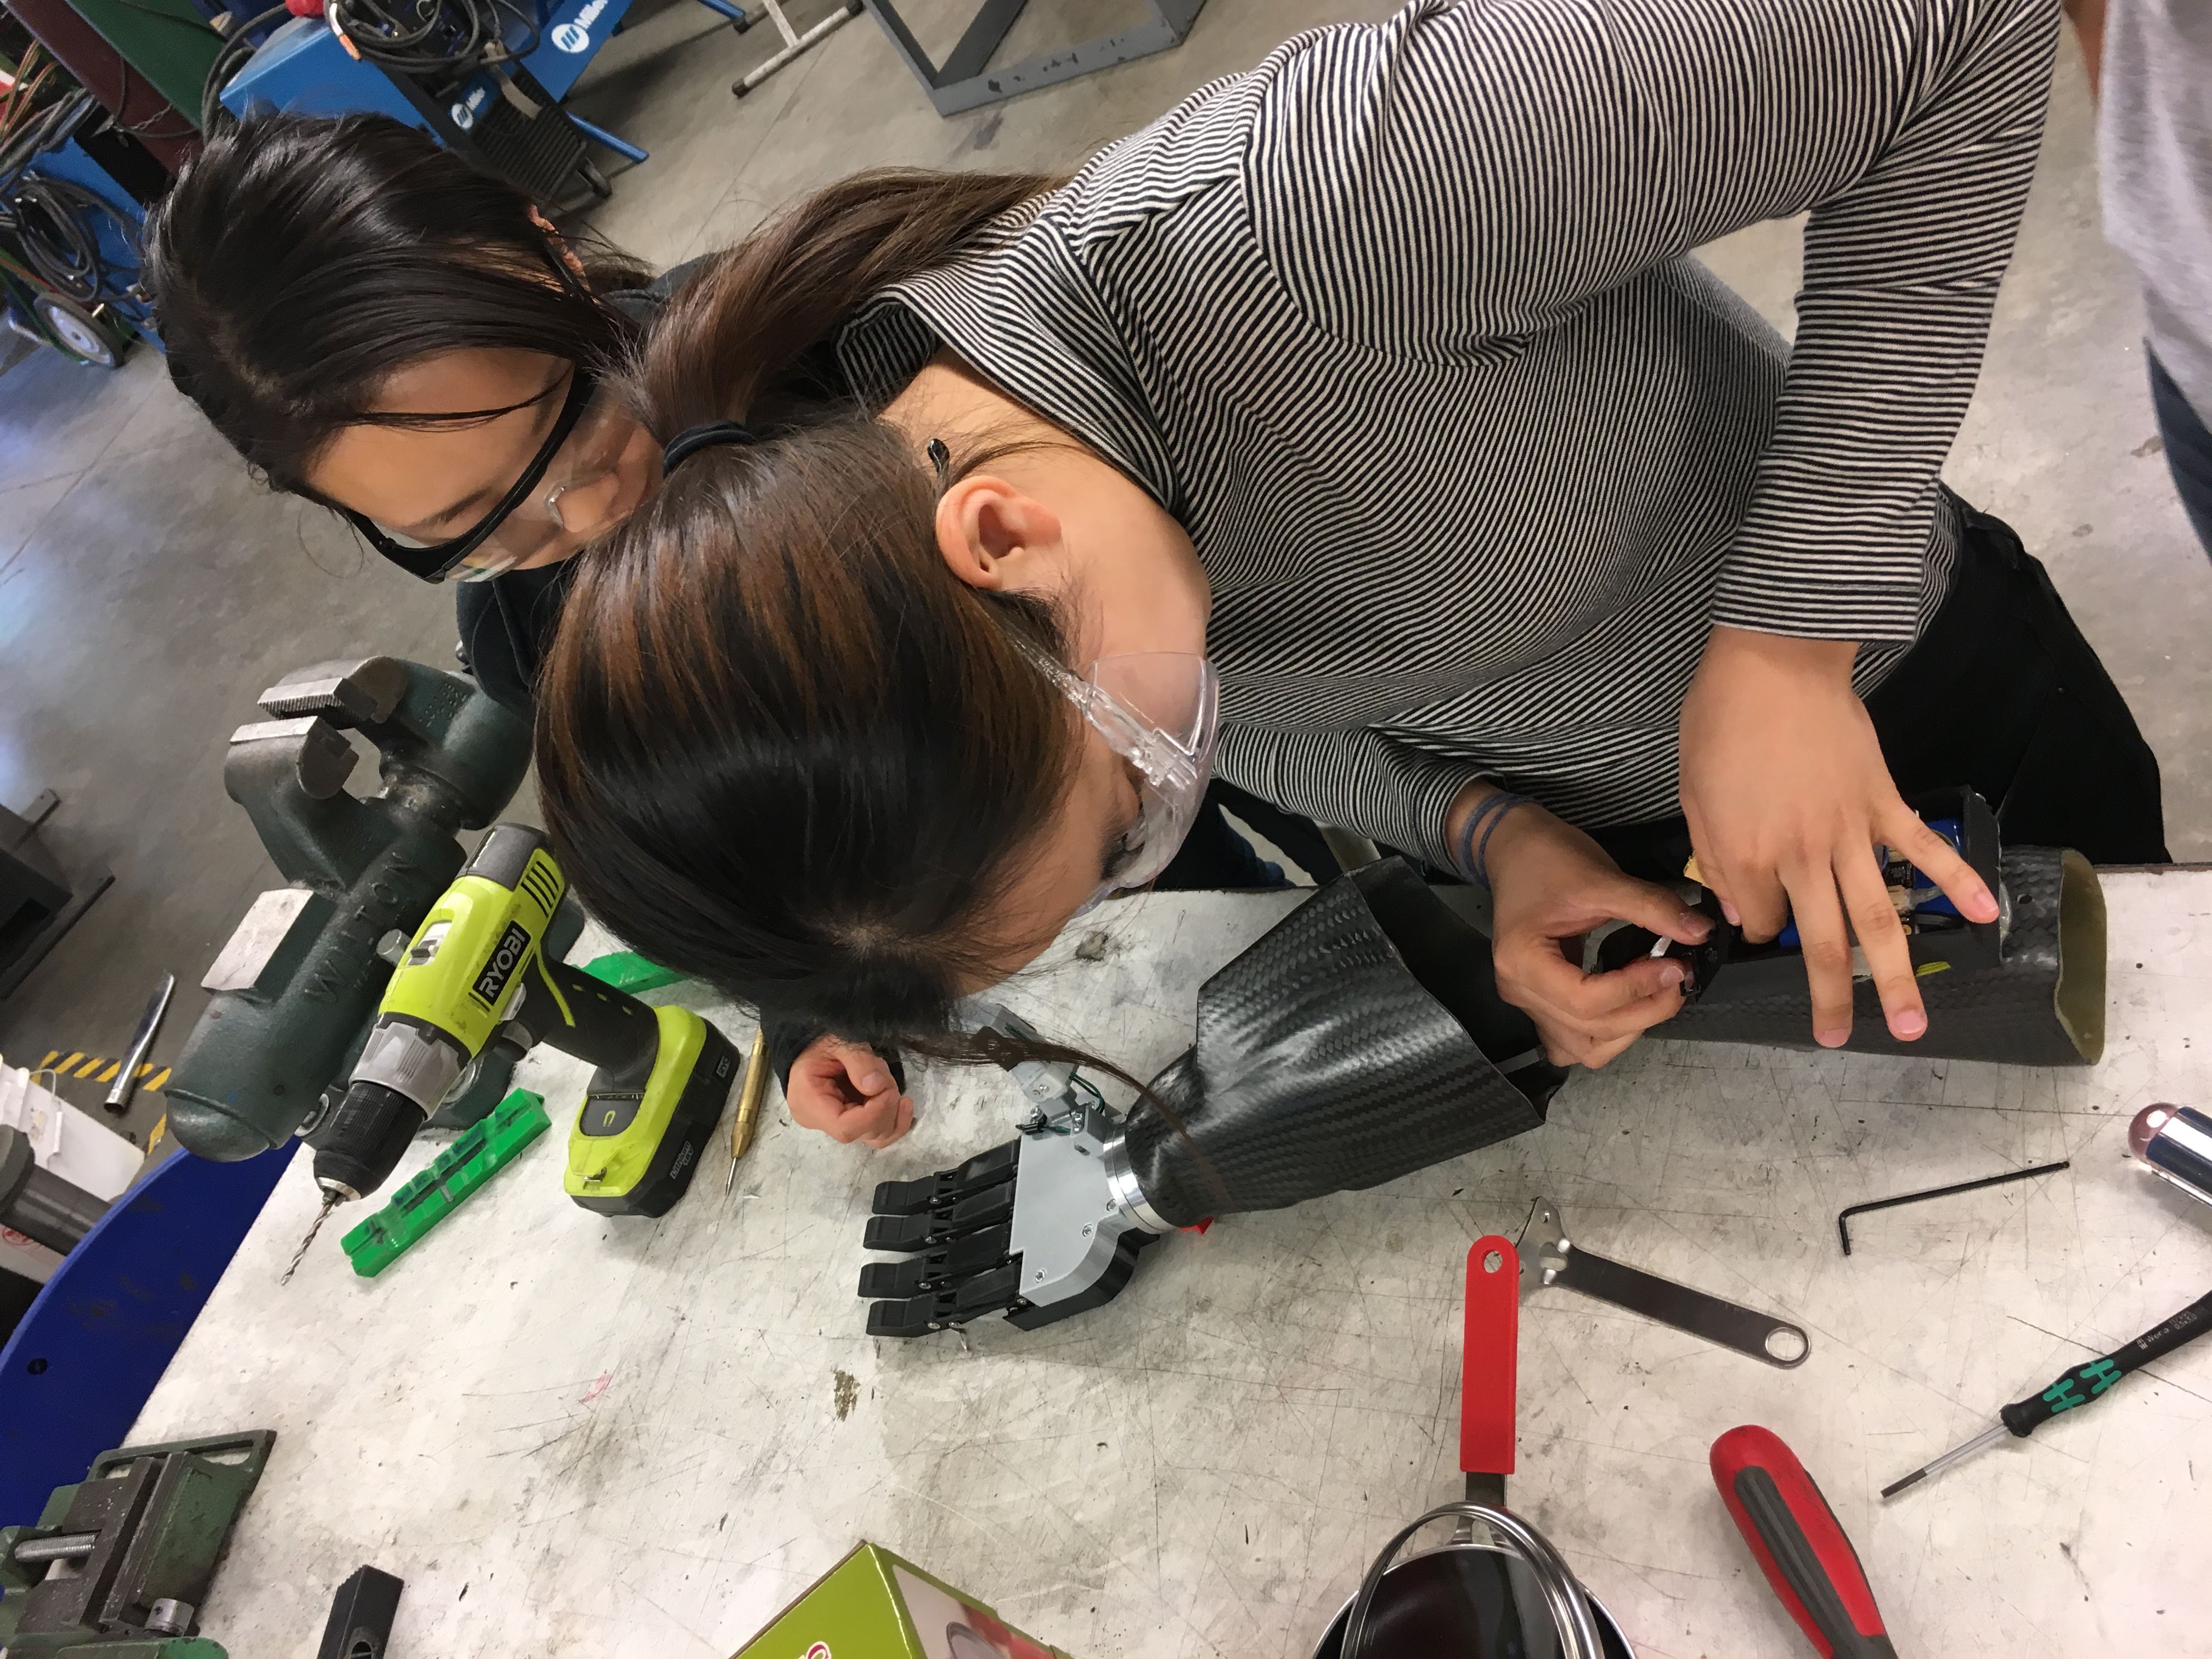
After that, we were finally ready to meet Bratcher again in Spring 2019. By this time, Bratcher actually already got insurance to pay for a professional prostheses (yeah, we weren't supposed to take 3 years...). However, he was still willing to test our model out and give us some feedback. So, we put together the palm with all the digits and the circuit boards, and assembled the wrist and socket portions. It was a little like building a ship in a bottle, and to be frank, I'm surprised the wires stayed properly connected. Note to self, slip rings are a thing.
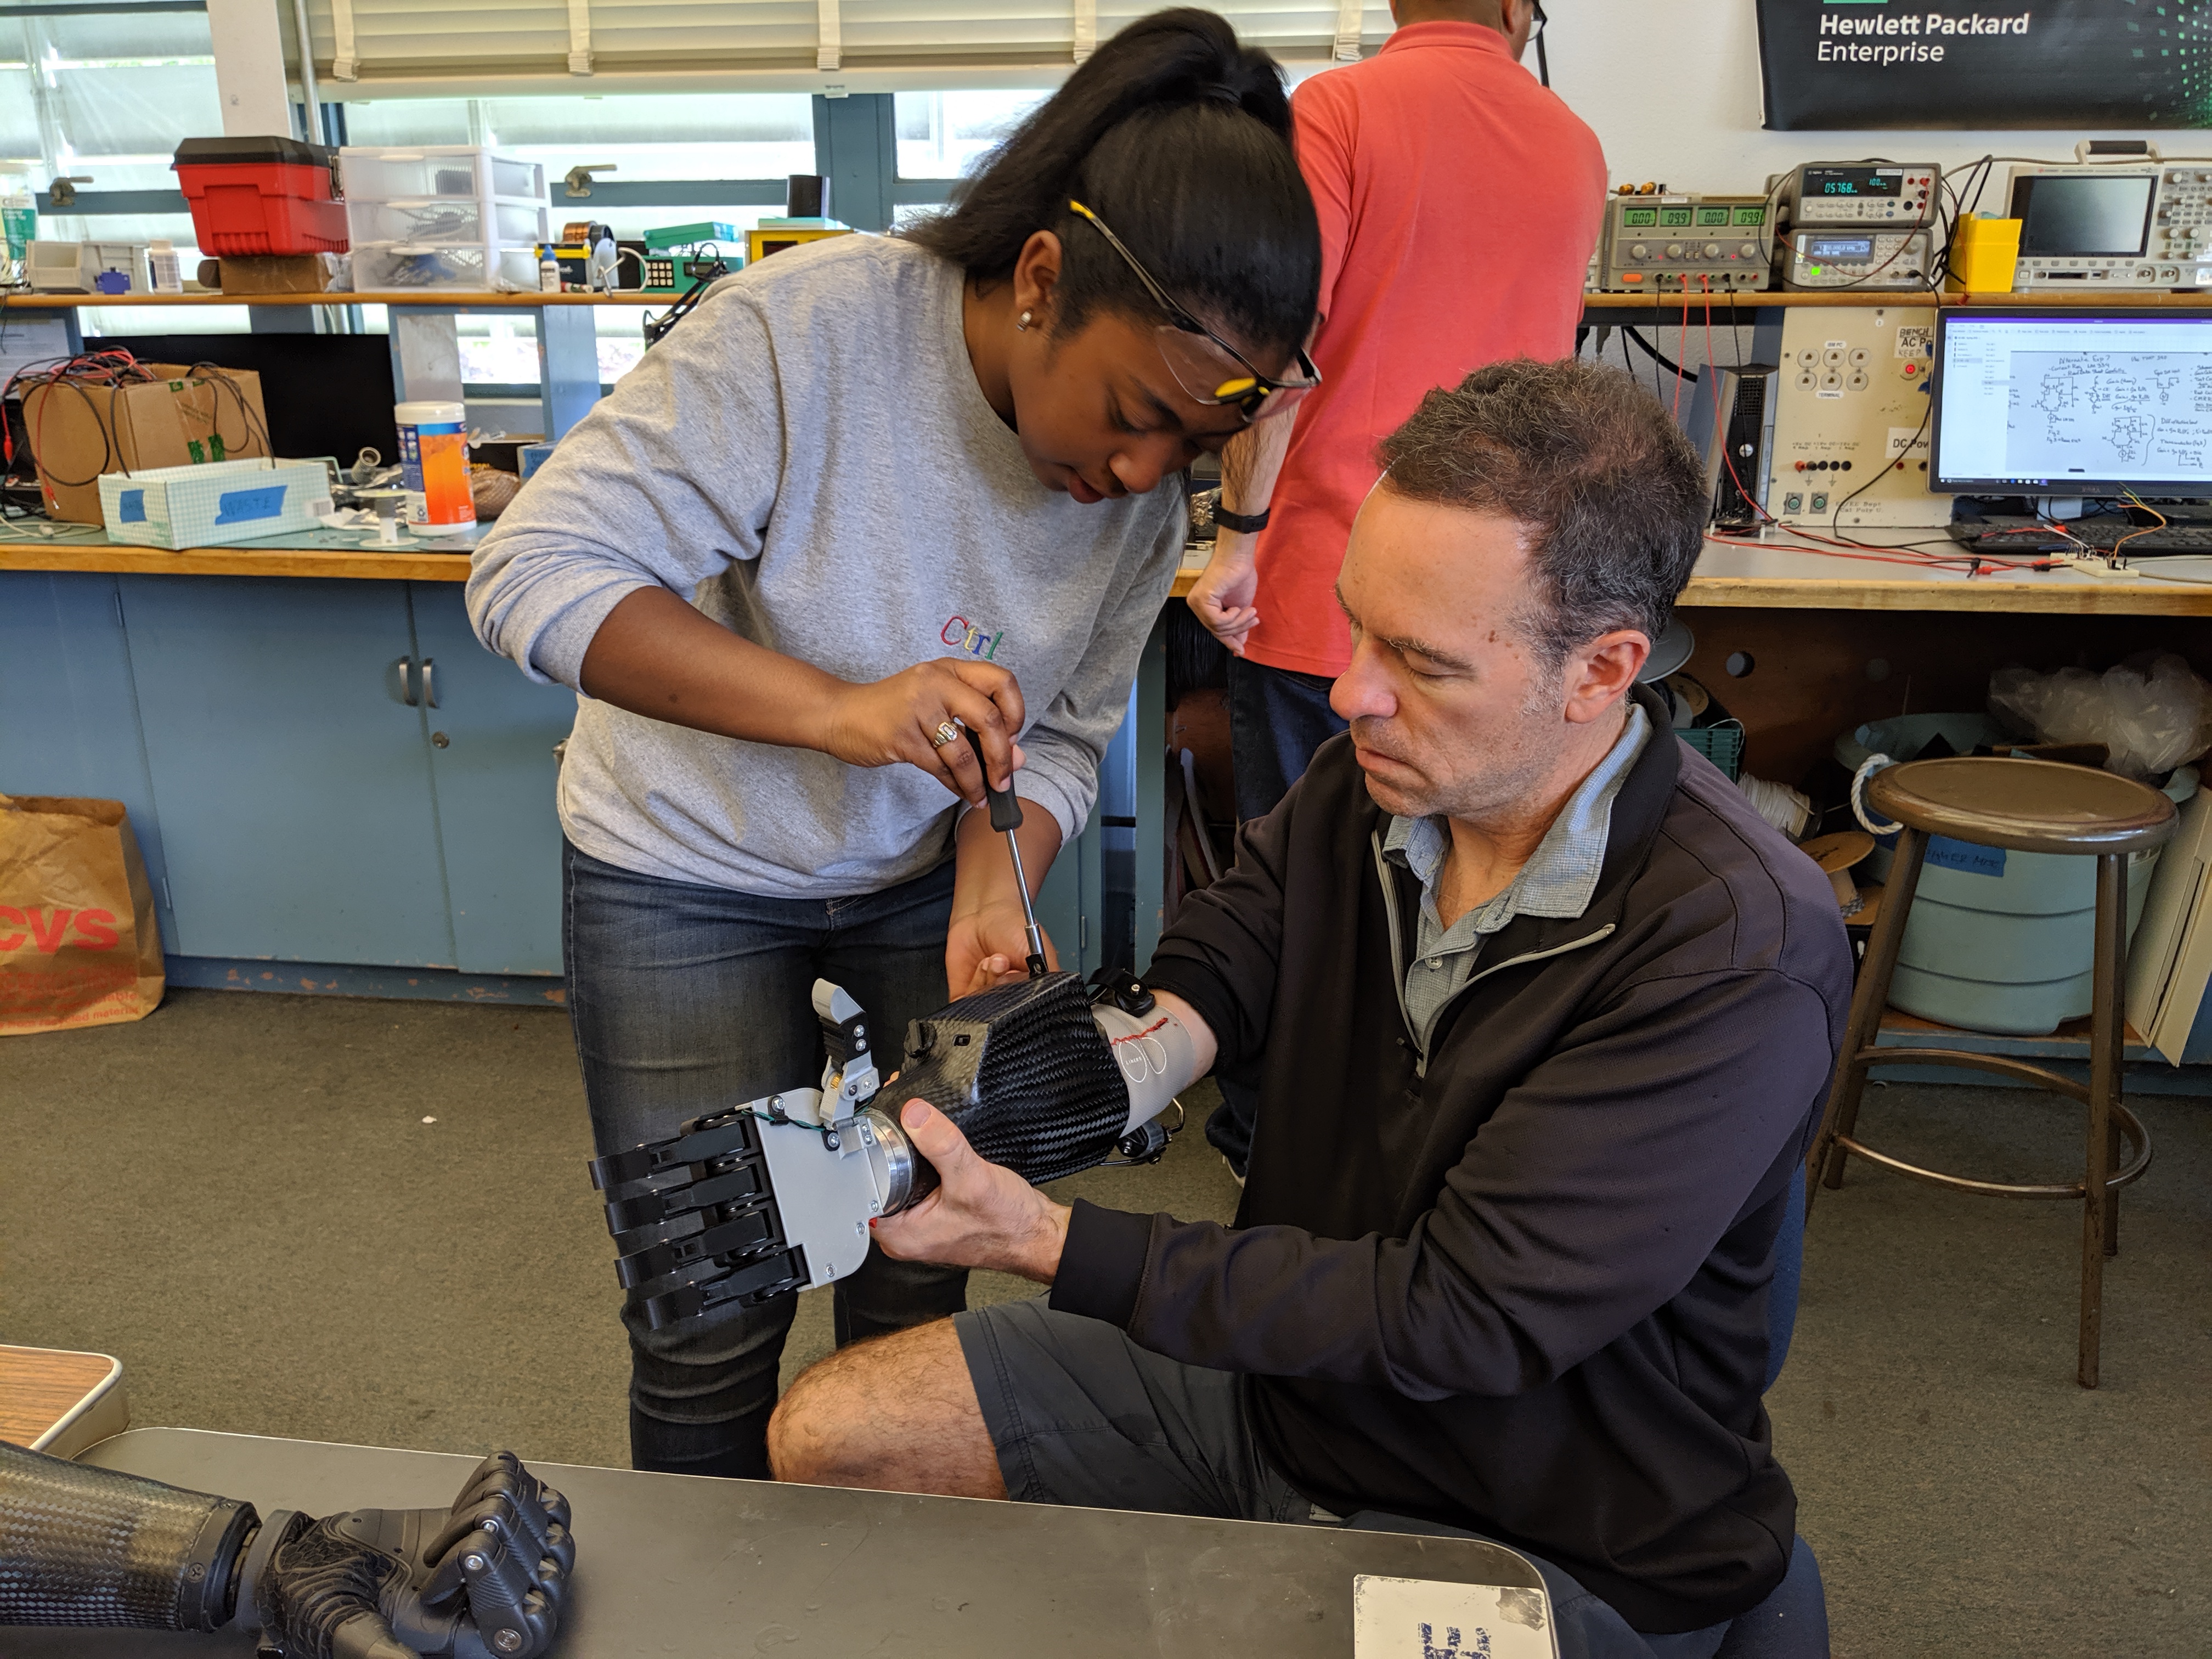
D-Day
As usual, we were working right up to the moment Bratcher arrived. We first had to fit the socket onto Bratcher and ensure the sensors had proper contact with his forearm muscles. Residual limbs may also change shape over time, which is part of the reason why prostheses are so expensive, and we are no professionals, so the fitting took some wriggling. Of course, we couldn't escape Murphy's Law, and something had to go wrong: one (out of two) sensors decided to fall right out of the socket and completely disconnect from the wire. The connection was quite unsalvageable, so we decided to make some HoT fiXEs instead. We wired in an external button and modified the firmware so that pressing the button toggles between open and close mode, and Bratcher would just use wrist flexion to "enable" movement. The control was a little unintuitive, but it allowed us to continue testing the whole system. Check out the video below to see the hand in action!